Want to keep track of who signs into your Windows 10 Laptop? Here is how

Security features are a centerpiece in Windows 10. Starting with BitLocker, as the foundation for encrypting files and folders, followed by Windows Defender, a built-in, free anti-malware suite which is constantly updated and improved by Microsoft, according to its new mantra of “Software as a Service”, and finally, Windows Hello, a system designed to protect Windows 10 from unauthorized access, by means of biometric authentication.
Speaking of the latter, Windows Hello’s default fall-back is typically either a PIN or a password: two methods that are considerably less secure than face, iris, or fingerprint recognition.
If your Windows 10 laptop or desktop doesn’t have any kind of hardware-based biometric authentication available, there are a few things you can do to strengthen security from the software itself, in such way as to being able to detect unauthorized attempts at logging in.
How to find out who tried to pick your lock on Windows 10
Depending on the version of Windows 10 that you’re running, there is one or two ways to set up your login screen to display information about who logged in last, and when, as well as whether the attempt was successful or not.
If you are on Windows 10 Pro, Education, or Enterprise, Local Group Policy is where you need to modify your security settings to achieve your objective.
- First of all, hold down the Windows key and press R, to bring up the Run command prompt.
- Next, type gpedit.msc and click OK. This will open the Local Group Policy editor.
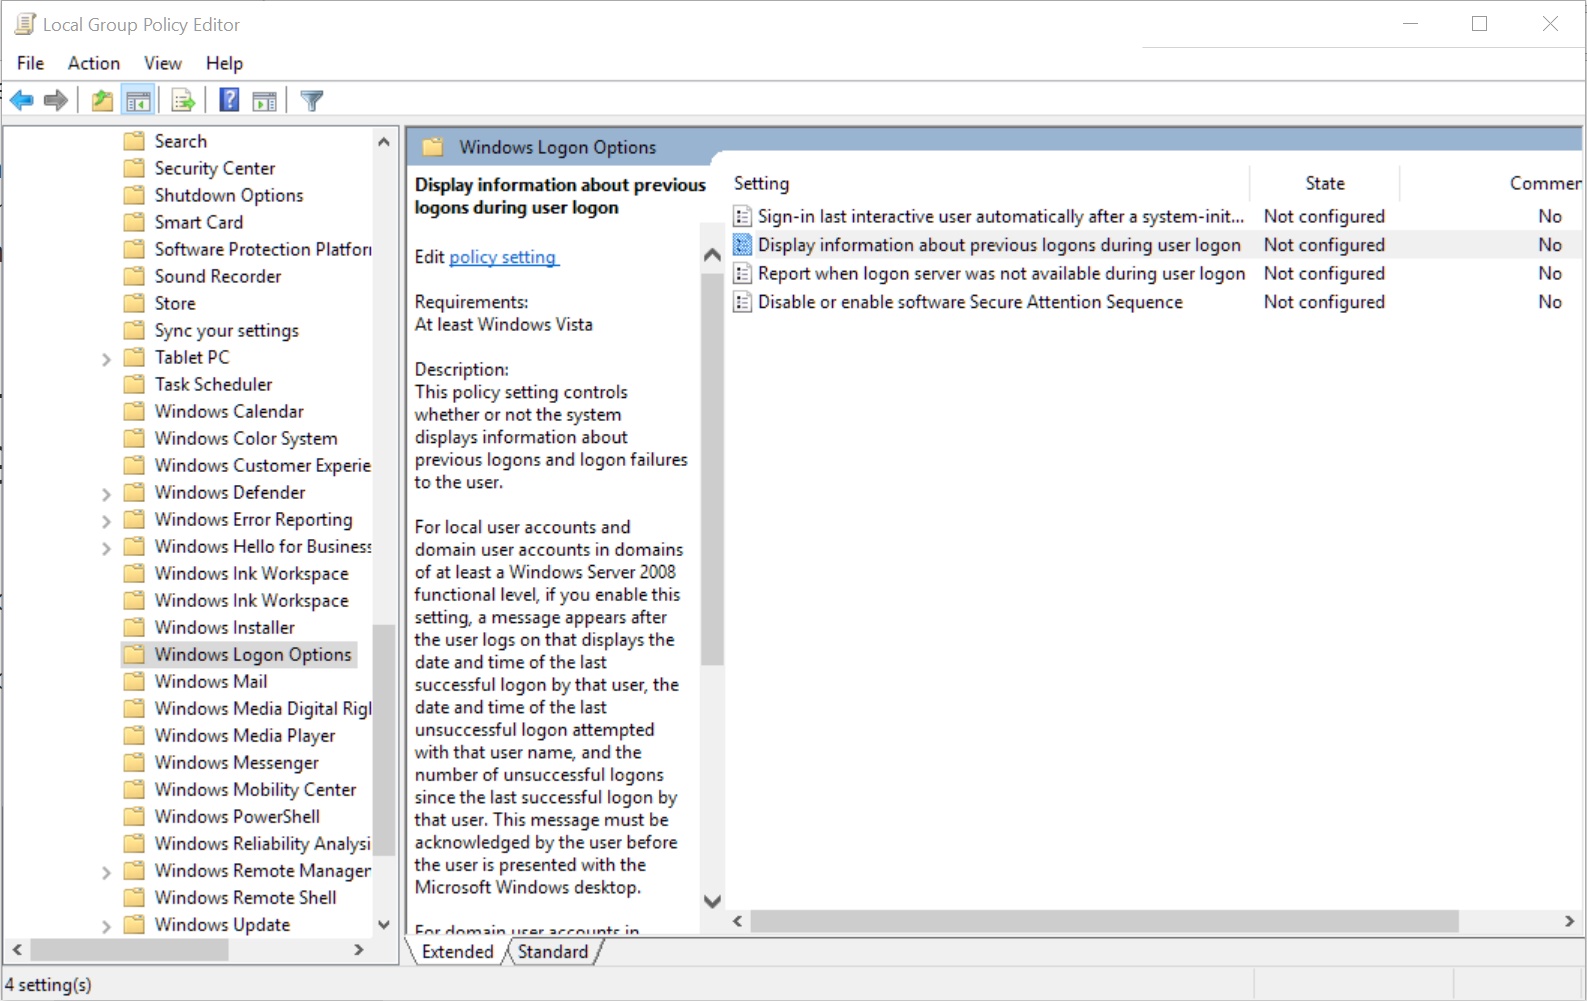
- Navigate the folder tree on the left to go to Computer Configuration > Administrative Templates > Windows Components > Windows Logo Options.
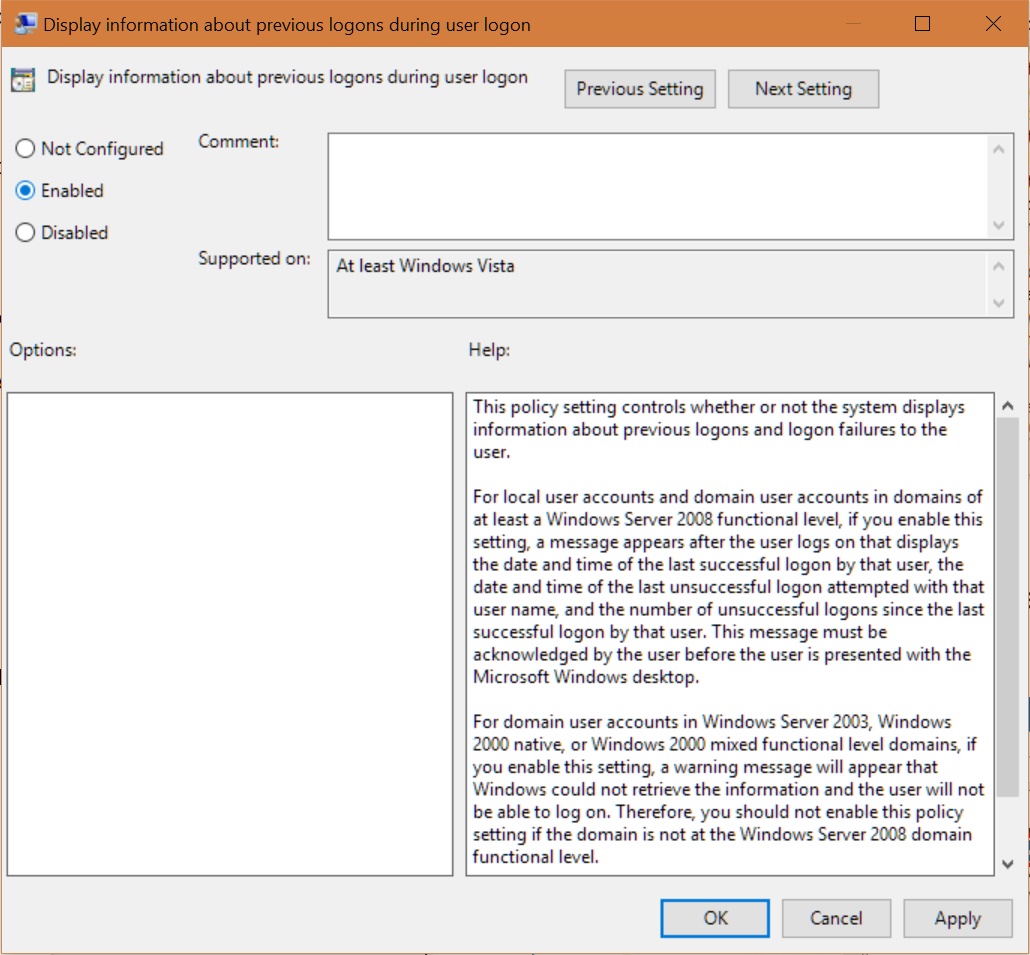
- At this point, double-click on “Display information about previous logons during user logon”. A window will open.
- On that window, click on the “Enabled” radio button to enable the new policy.
- Click Apply, and then OK.
On Windows 10 Home, the procedure involves interacting directly with the Windows registry, which should be typically done by someone a little more tech savvy. At any rate, proceed at own risk.
- Much like in the previous instructions, Windows key+R will bring up the Run prompt. Type “regedit” into the box and hit enter or OK.
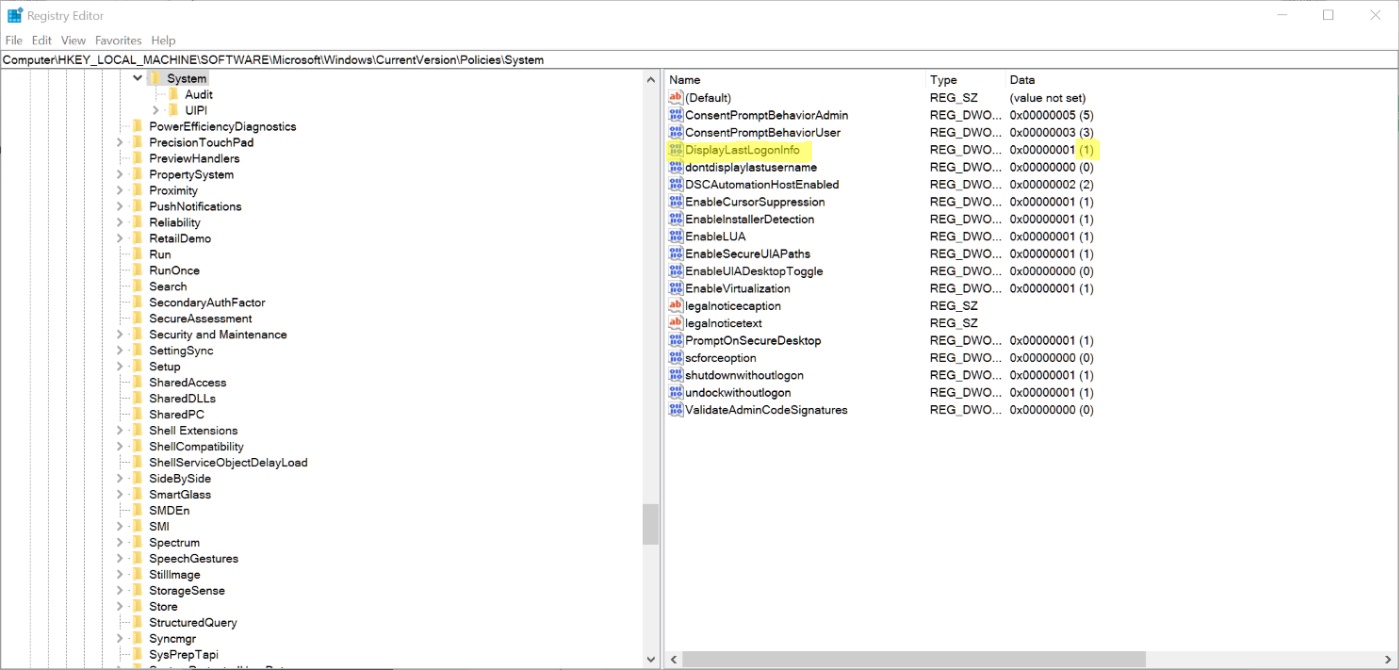
- Browse the registry editor through:
- HKEY_LOCAL_MACHINE\SOFTWARE\Microsoft\Windows\CurrentVersion\Policies\System
- At this point you need to create a new DWORD key. To do this, click New, and then “DWORD (32-bit) Value”. This will create a new entry in the current folder. Name the DWORD “DisplayLastLogonInfo” and press enter.
- Double-click the newly created key, and replace the 0 value to 1.
- Close the registry.
As a side note, if you no longer want to display logon information, changing the value from 1 to 0 will do just that.
From now on, using this method will allow you to know who last accessed your computer, when it happened, and how many failed attempts were made.
Ready to shop?
PortableOne has the best deals on Windows 10 Pro laptops, featuring the latest hardware-based security features, and full BitLocker encryption to protect your files from prying eyes.