Running out of Storage on your MacBook? Here's a DIY solution from PortableOne.com
Upgrading the storage on a Retina MacBook Pro it’s not as daunting a task as one may think. As a matter of fact, depending on one’s skill and technical inclination, PortableOne.com offers it customer's two ways to increase the size of the storage on a MacBook Pro at home.
The easy way:
Memory chip manufacturer Transcend has conceived an easy, plug-and-play solution to upgrade a MacBook’s storage. The Transcend Lite is a flash module that utilizes the existing SDXC card slot for an instant boost in storage space, up to 128GB.
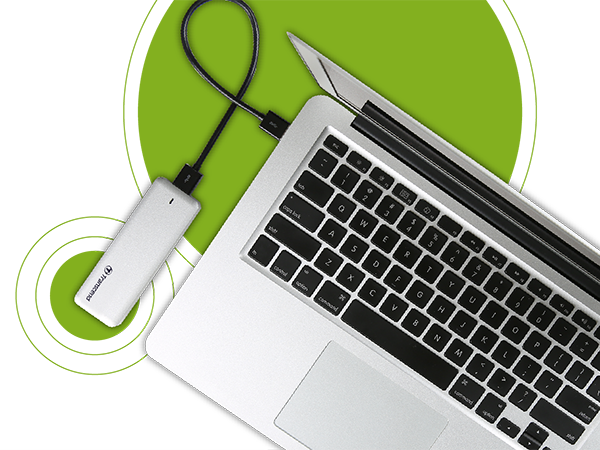
- Sometimes 128GB just won’t cut it, in which case, Transcend JetDrive comes to the rescue, in the form of a flash memory module, accessible from an external enclosure, which connects to the MacBook Pro’s USB port, for instant upgrade up to almost a Terabyte.
The Cool Way
The above mentioned JetDrive can be ordered as part of the JetDrive Upgrade Kit, for MacBook Air and MacBook Pro. The kit comes with all tools and components needed, and with detailed, step by step instructions on how to successfully perform an internal SSD upgrade, as well as turning the original SSD module into external memory available through the JetDrive enclosure.
The JetDrive Upgrade Kit comes with one pentalobe screwdriver, and one tri-wing screwdriver, necessary to remove and replace Apple’s proprietary screws.
The enclosure is also included, along with the three screws needed to assemble the SSD memory modules into it.
Step 1: Backing up all data on the old drive
This is a no-brainer, and should be done every time storage is upgraded, to avoid unexpected surprises.
Step 2: Examining the content of the enclosure
Spending a bit of time familiarizing with the hardware at hand is important, to be able to quickly identify the different components as we move along the tutorial.
The enclosure is made of three components:
- The two half-shells of the enclosure
- The USB 3.0 connector
Step 3: assembling the enclosure
The included storage module’s gold connector plugs directly into the back of the USB connector, and it can only fit in one way, to ensure proper alignment. Make sure never to touch directly any golden pathway on the module’s circuit board. The fit between the two components is typically quite snug, allowing for no movement whatsoever.
Once the USB connector and the module are attached together, it’s time to slide the unit into the enclosure, in such way that the external connector faces the external slot. To make things easy, the storage module is fitted with three holes that align with the internal design of the enclosure.
Finally, secure the enclosure with the provided screws, without over tightening them.
Step 3: Initialize the JetDrive
Using the provided USB cable, we need to connect the JetDrive to the MacBook, and boot up into recovery mode, by holding down Command+R, as we turn on the MacBook.
Once in Recovery mode, we’ll open Disk Utility, and identify the new storage drive, and initialize it, by erasing its contents (Click on the “Erase” tab, then click on “Erase” on the bottom right of the window). this will result in the formatting (initialization) of the new storage device.
Step 4: Clone your data
Once the new drive is formatted, we will select the local storage on the MacBook, and select “Restore”.
In the “Destination” box, we’ll need to drag and drop the new storage device, and click on “Restore”. This action will do two things: it will erase the content of the JetDrive, and it will copy every bit of data from the local SSD, into the JetDrive.
Step 5: Remove the JetDrive module from its enclosure
By following Step 3 in reversed order, we will remove the JetDrive module from its enclosure, and leave the enclosure disassembled while we move onto step 6.
Step 6: Remove the local storage flash module
Let’s start by turning off our MacBook. Next, we will remove all the screws from the back of the device, and remove the panel.
In the 13 inches MacBook, Locate the flexible rubbery flap covering a small portion at the center of the device. It has a triangular warning sign, which is quite easy to spot, with due attention.
This flap covers three pentalobe screws, which secure the interface for the storage module, for which the T5 screwdriver is necessary. The right-most screw secures a plastic cover, which, once removed, will reveal another screw underneath. This will allow to disconnect the battery and remove the internal enclosure that houses the local flash storage drive, located beneath the touchpad.
The internal enclosure reveals an identical connector in which the storage in inserted. Simply remove the original storage drive by removing the screw at the end of it, and by lifting it off, while pulling the module out of the connector in one careful motion.
Finally, we will plug in the new JetDrive module into the MacBook’s connector, reassemble the storage housing and the battery connector.
In the 15 inches MacBook, the SSD storage is located on the left side of the device, and it’s visible, as it’s identical to the JetDrive SSD module, which makes the process less laborious.
If, by the time the back panel is reassembled, the number of screws outside the MacBook is zero, there is no need to start over, otherwise, repeat Step 6.
Step 7: enjoy the extra storage!
The great thing about the JetDrive is that it can be used to recycle the old SSD module, and turn it into an additional external drive for the MacBook, through the provided USB cable.
However, if you prefer to have your Mac upgraded by the professionals, PortableOne.com offers a wide array of upgrade services specially tailored to your specific needs. To contact one of our specialists, email us at support@portableone.com.