How to turn a Windows 10 tablet into a kiosk for your store or business
Kiosks are a common occurrence in retail stores, most often in the form of customized touchscreens, offering information to customers about products and services available, or even an alternative way to make purchases, check inventory, and order items. For instance, many phone carriers like Verizon, use kiosks in their stores to let customers pay their phone bill, or modify their plans, without having to set an appointment.
Many bridal stores and other fashion outlets have kiosk devices, in the form of iPads for example, that are setup to let customers browse merchandise while talking to a salesperson.
While Apple seems to retain the lion’s share of kiosks in retail, Windows 10 tablets, like the Microsoft Surface Pro 4, can also be set up and turned into powerful kiosks for your business.
Requirements
- Any tablet or PC that can be secured to a desk, a wall or other non-removable fixture, which allows access to an input method like the device’s touchscreen, or a stylus, like the Surface Pen, tethered to the device.
- Windows 10 Pro, Education or Enterprise
It’s not possible to do convert a Windows 10 Home edition PC into a kiosk. This is because we need access to a feature called “Assigned Access”, which is only available in Windows 10 Pro, Education or Enterprise.
Using the Assigned Access feature allows the owner of a PC to set a special account on Windows 10 where only a certain list of apps can be accessed. For instance, the owner of a clothing store who has a custom Windows 10 app to show merchandise to customers, may want to have a number of Surface Pro tablets in his store to be able to access only the custom app and nothing else, to prevent customers from tampering with the tablets and use them for purposes other than what a kiosk is for.
Local versus Live accounts
The first step is to create a local account. The difference between a local account and a live account is that an administrator needs a live account to authenticate certain applications, or activate Windows 10 on other computers, for instance when transferring a Windows 10 license from a computer that no longer works, onto a new one.
A local account is typically suitable when adding family members, so they can use their own individual accounts and apps on a shared computer.
Local accounts are administered by a single live account, which is the one under Windows 10 is registered as the owner of the PC.
In Windows 10 Pro, a live account can be used to create a local account with restricted privileges, which is what happens on corporate networks when creating Windows 10 accounts for employees.
These accounts can be set to access a restricted number of apps, and can also be set to access a more limited array of Windows 10 features, for instance the ability to remove web filters in Microsoft Edge, or the ability to access the Settings app or the Control Panel.
Let’s begin!
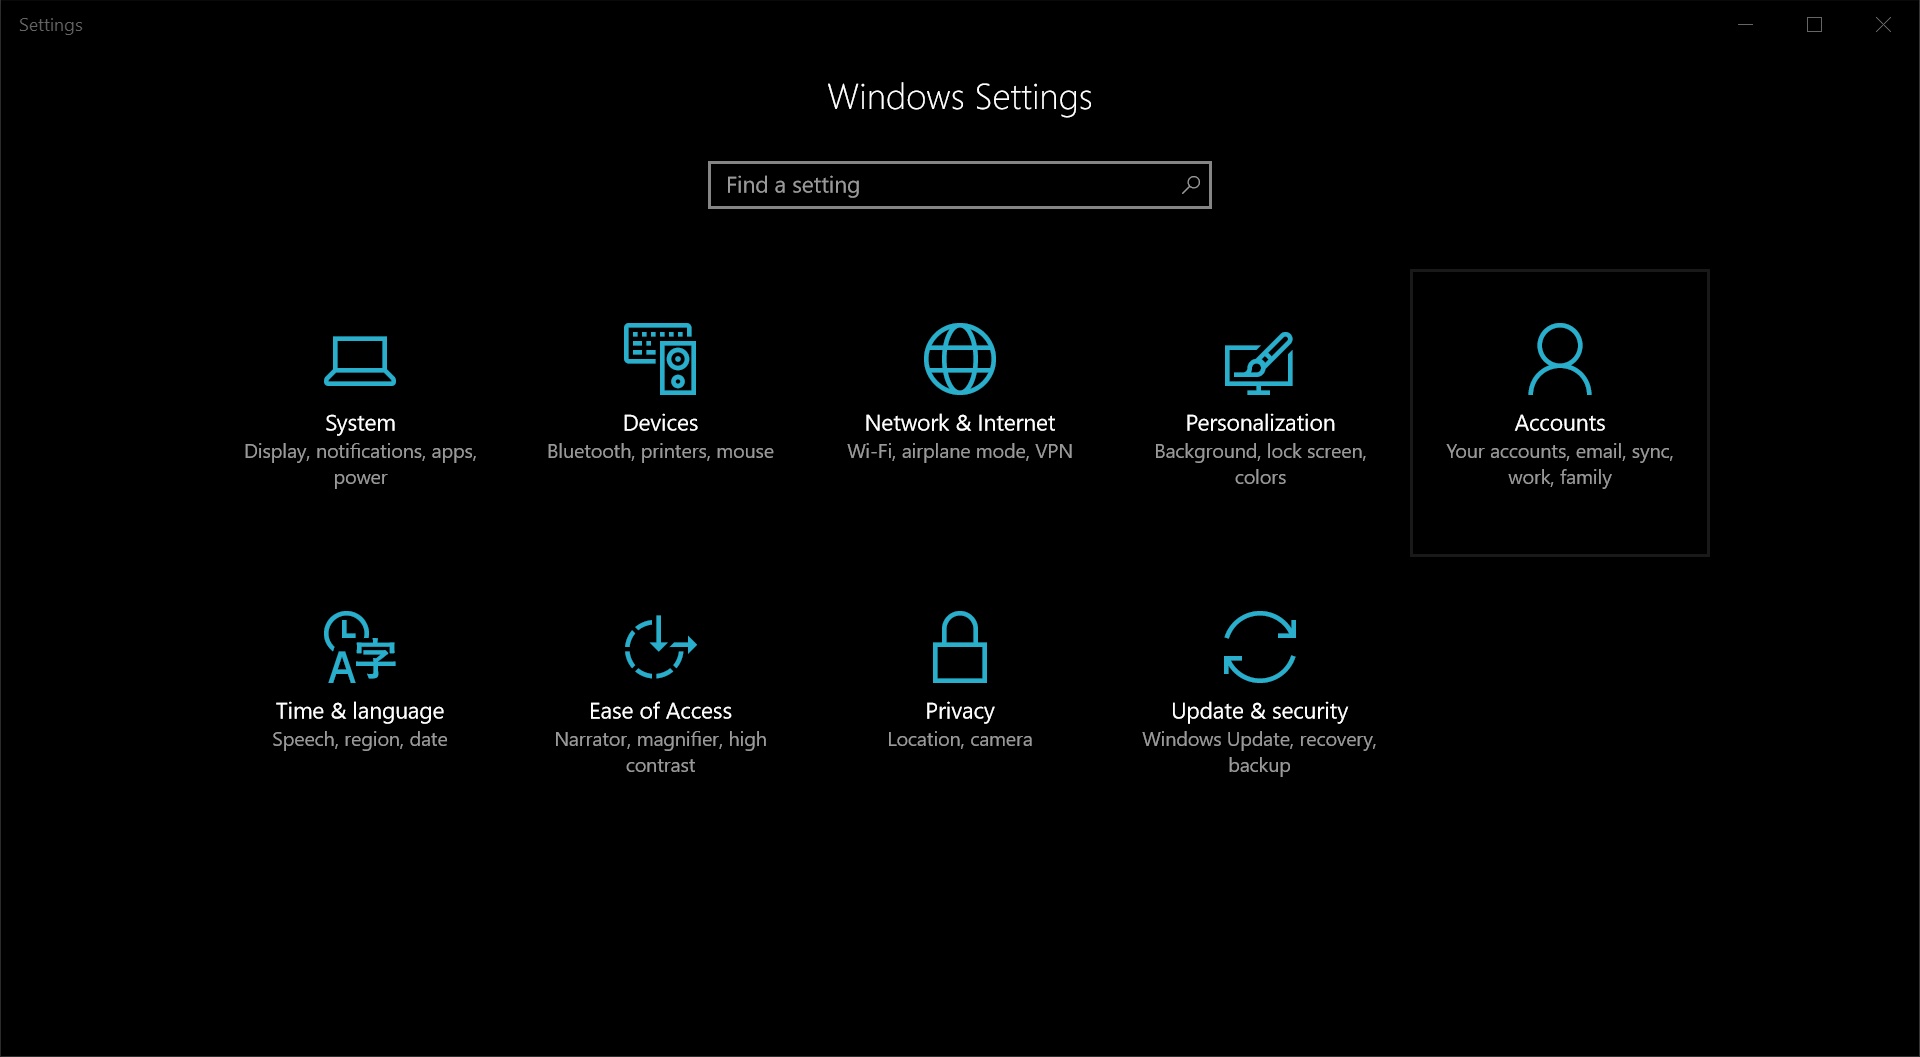
To create a local account, as mentioned earlier, we need to be logged in as Administrator in Windows 10 Pro, Education of Enterprise, and enter the Settings app (Win+I).
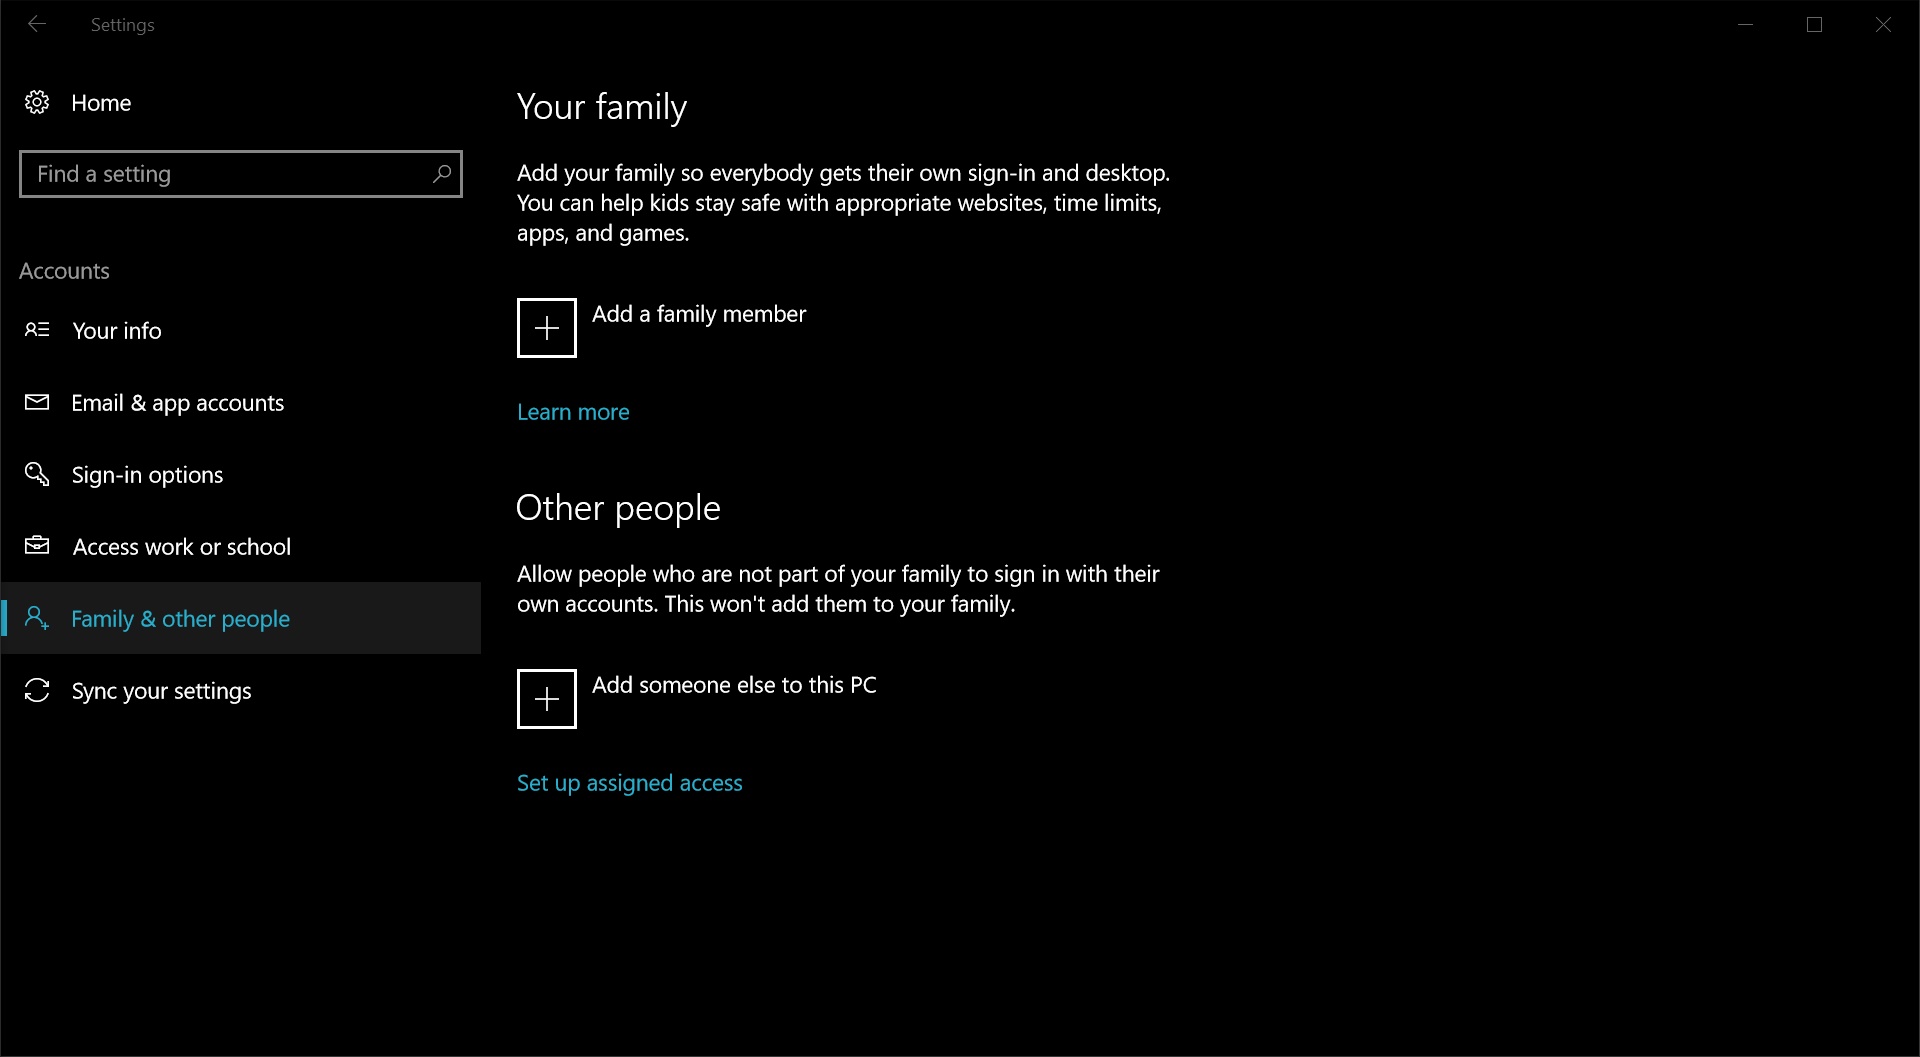
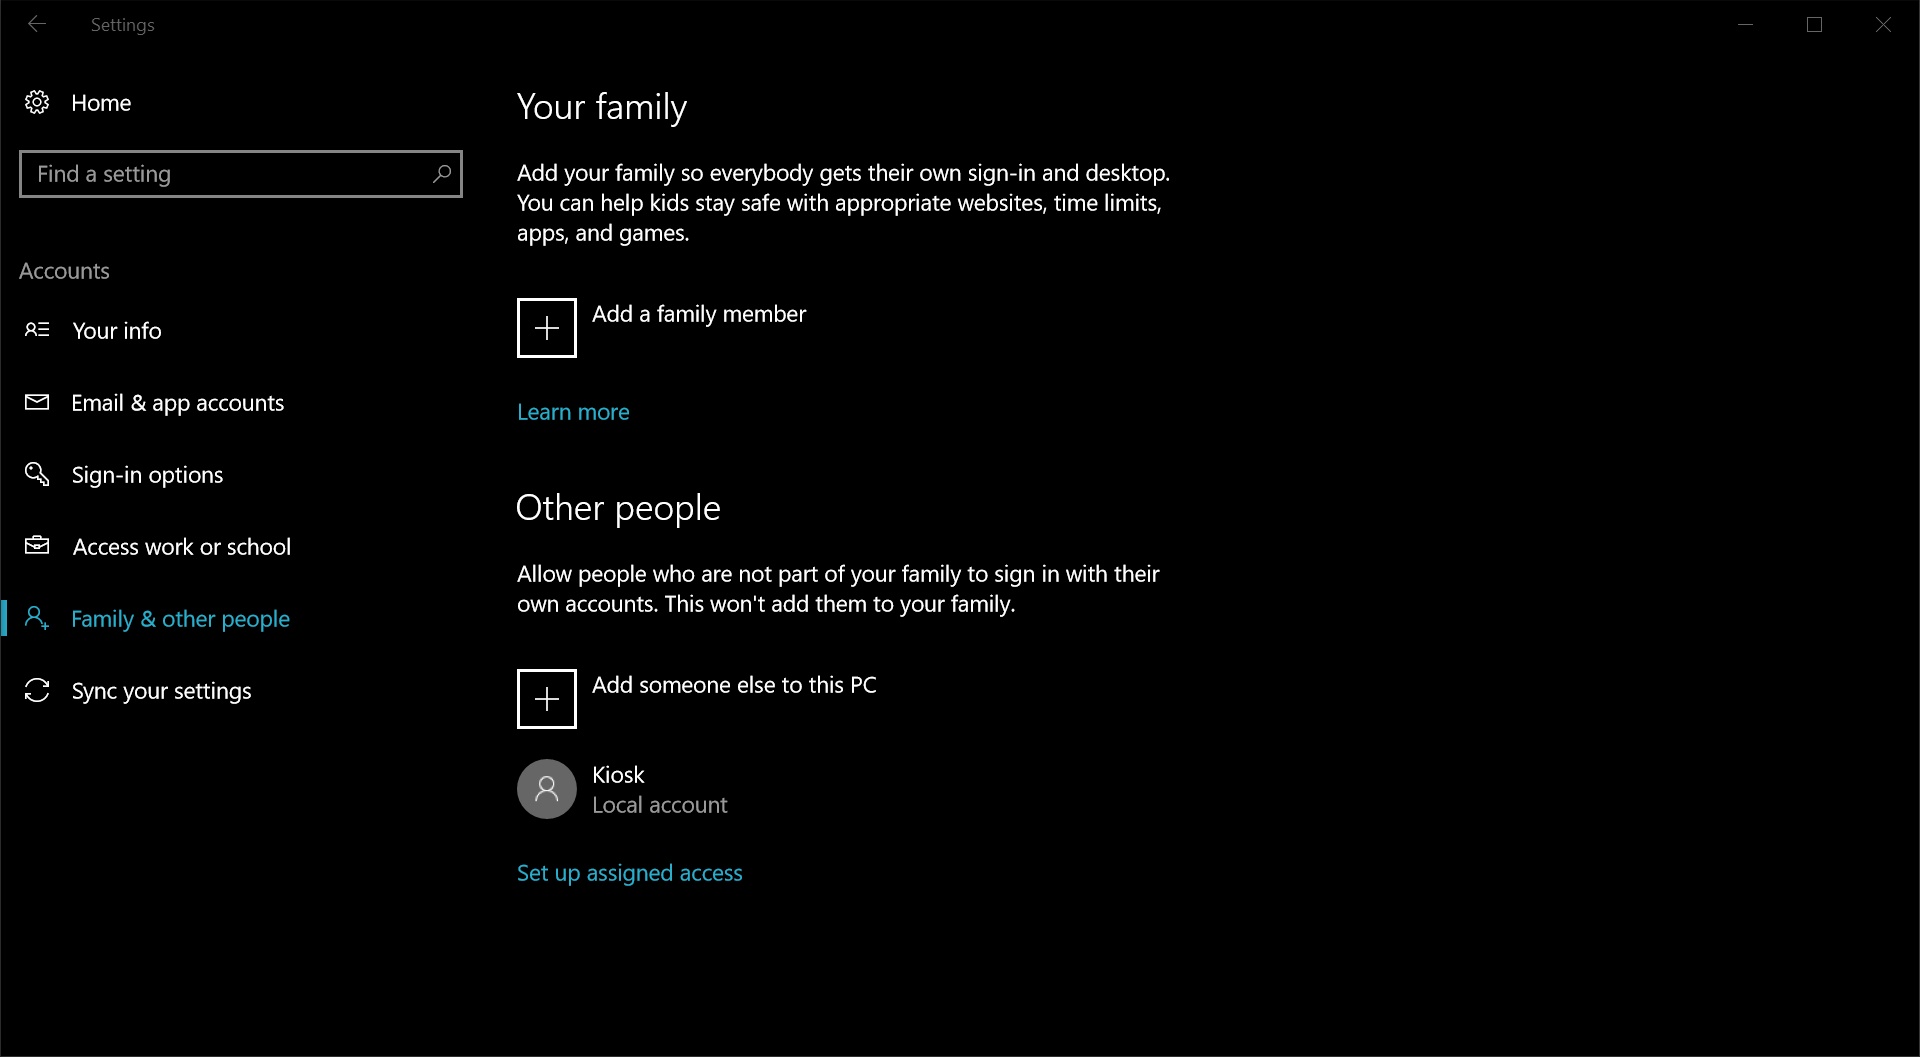
Once in the Settings app, we will click on Accounts, and then select “Family & other people”, and under “Other people” we’ll click on “Add someone else to this PC”.
We are now ready to create a new account, however we have two options on this screen, and only one will allows us to create the local account we need to set up on our new Windows 10 kiosk devices.
The way to create a local account is to click on “I don’t have this person’s sign in information”, at which point the following screen will ask to the new user’s Microsoft account information.
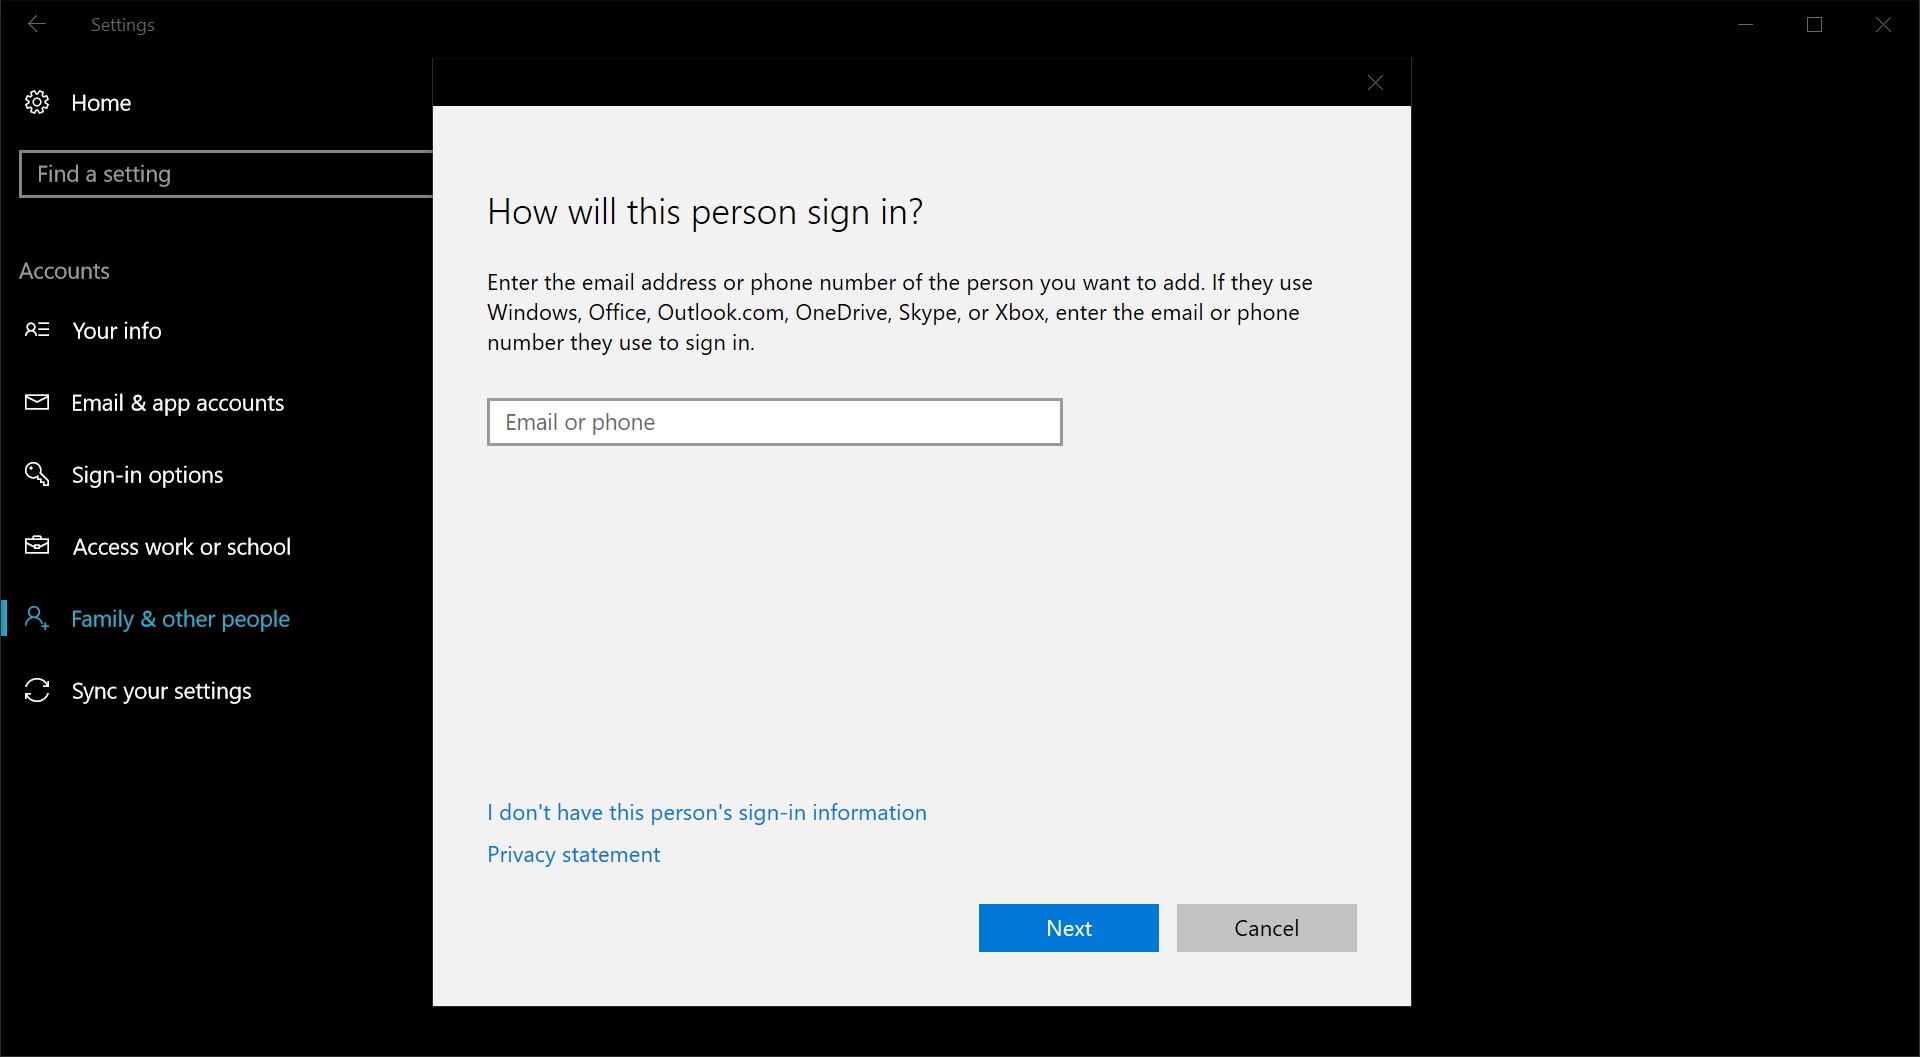
At this stage, inputting a Microsoft account would still result in the creation of a Live account, which is not what we want to do, so we will click on “Add a user without a Microsoft account” at the bottom of the “Let’s create your account” screen.
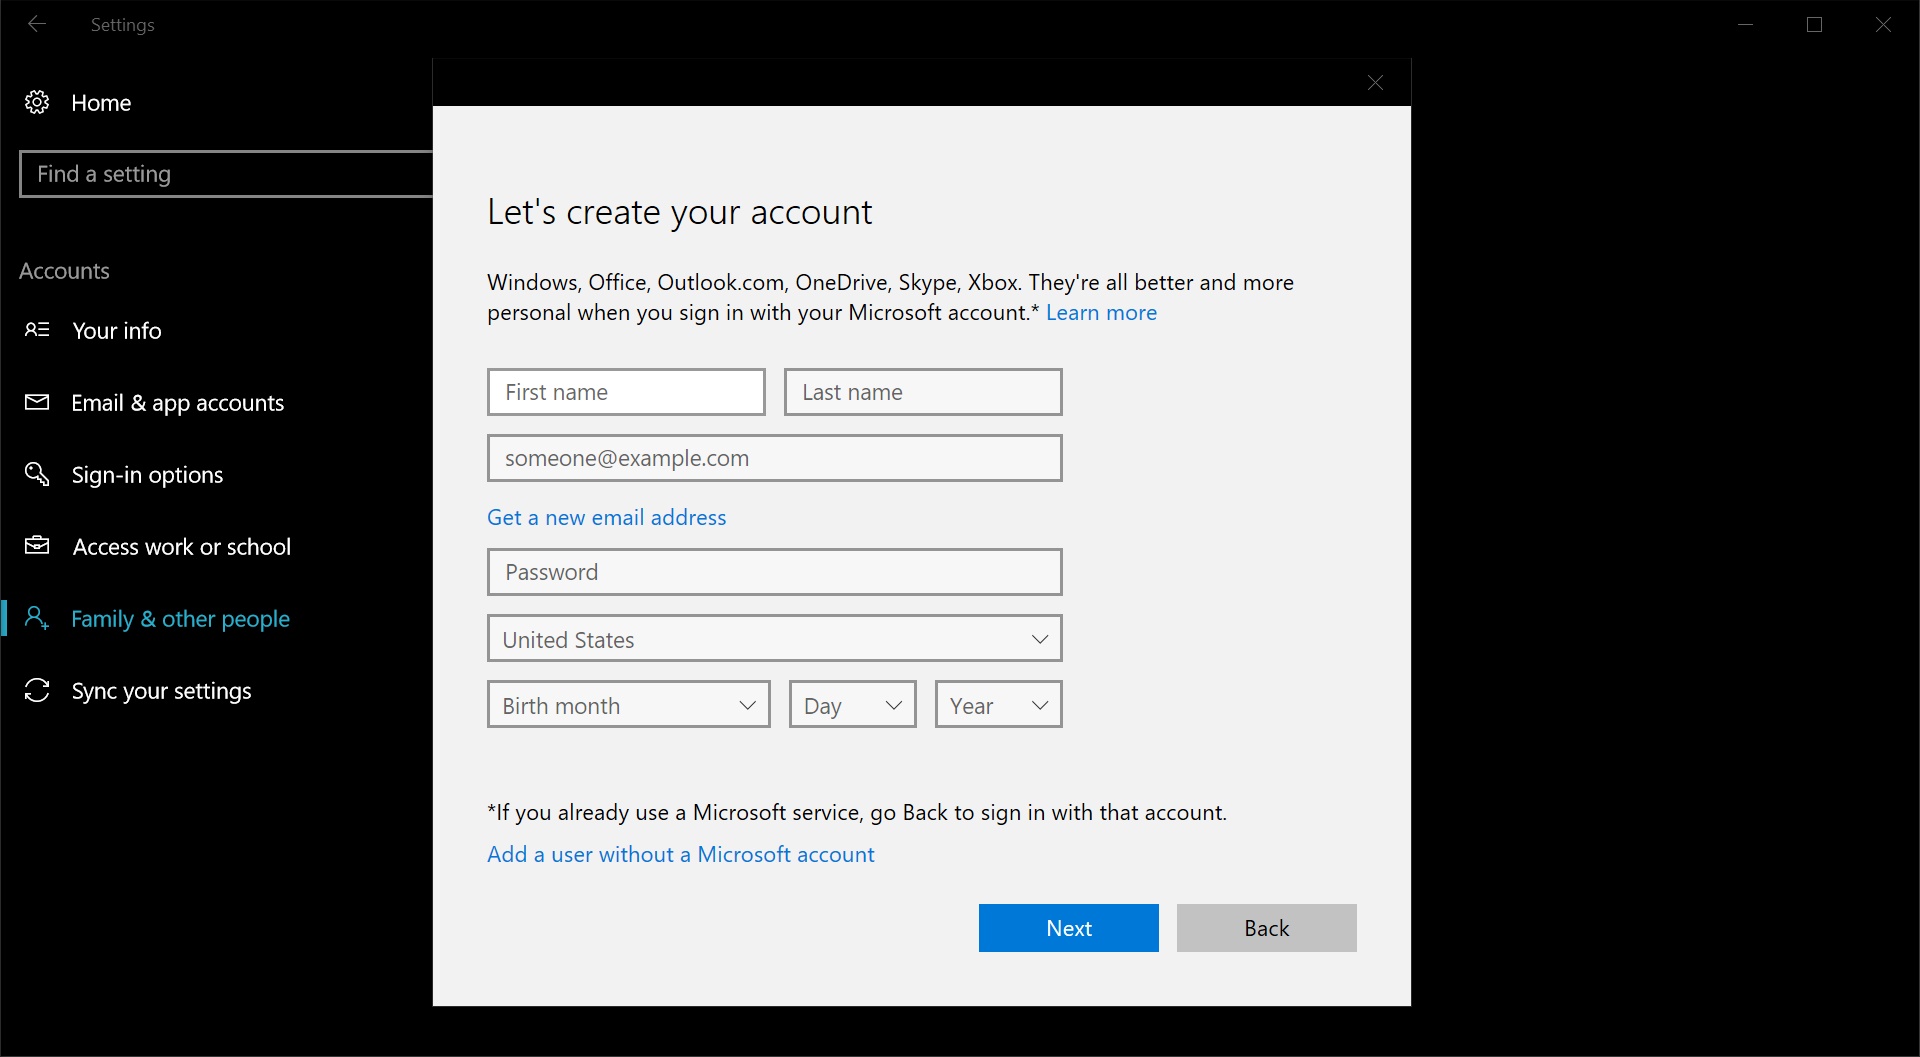
Finally, after clicking on the above-mentioned link, we are greeted by a “Create an account for this PC” screen. This is where the “magic” happens.

All we have to do now is enter a username, a password, and a password hint. Once you are done, click next.
Configure apps
At this stage, it may be necessary to log into the newly created account at least once, to be able to use Assigned Access, and configure access to apps. With that said, we have noticed that as of the latest Windows 10 Preview Build 96093, this is no longer a requirement, and apps can be chosen right away.
Either ways it is recommended to login at least once with the new account, just in case, to ensure that Windows 10 creates all necessary account features.
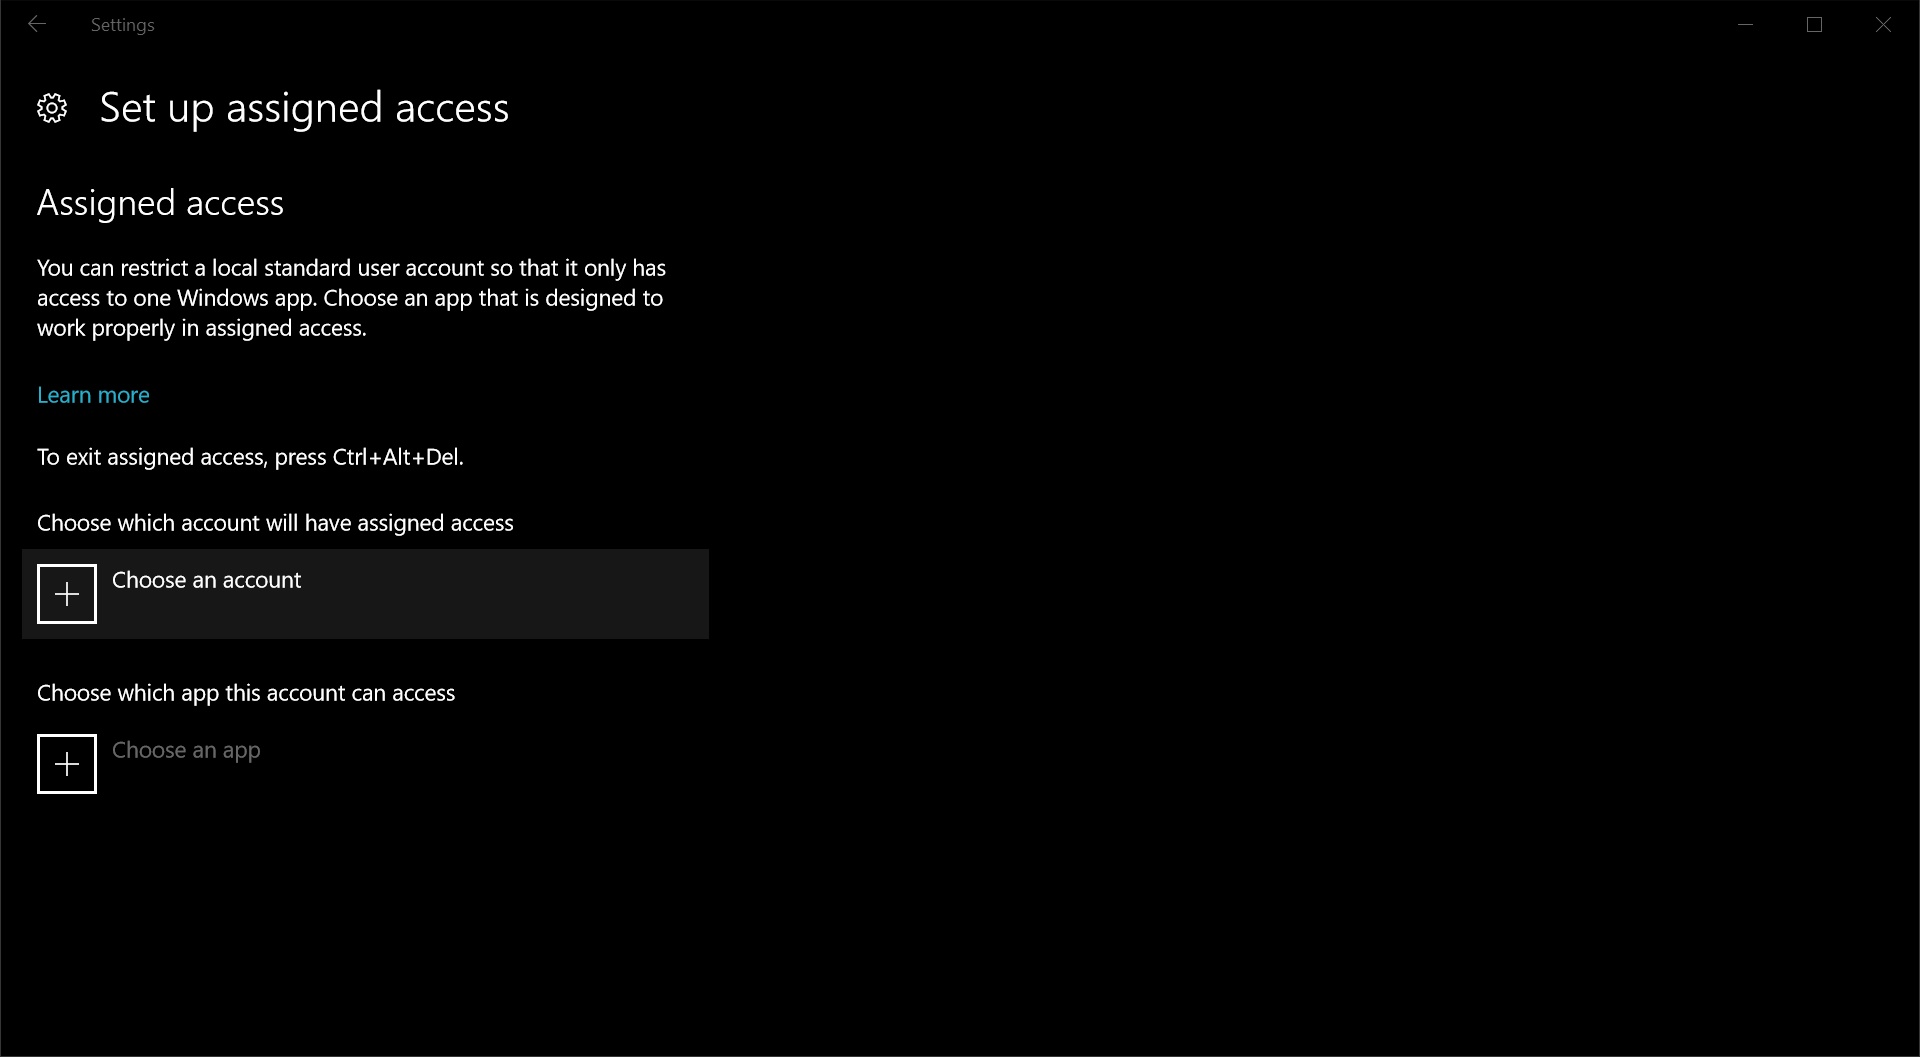
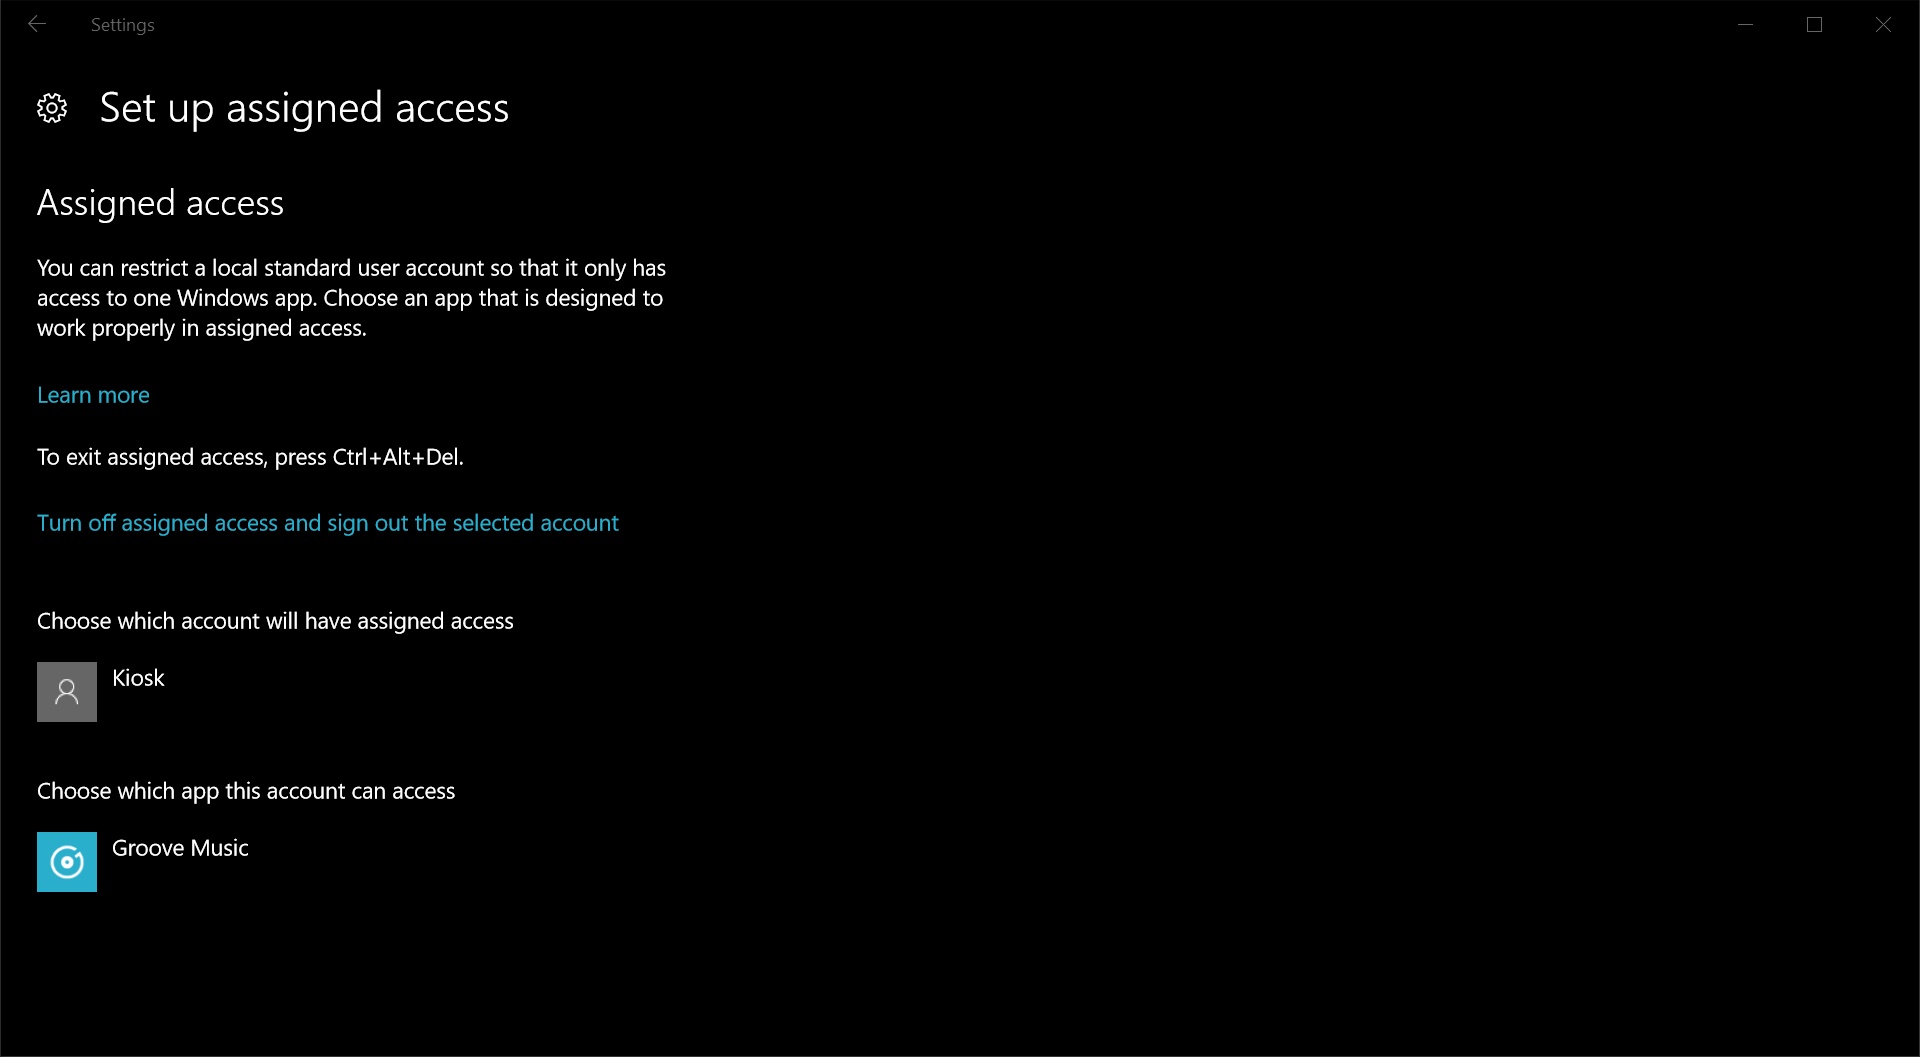
Once that step is complete, we need to log back into our administrative account and go into Settings > Accounts > Family & Other People, and click on “Set up assigned access”.
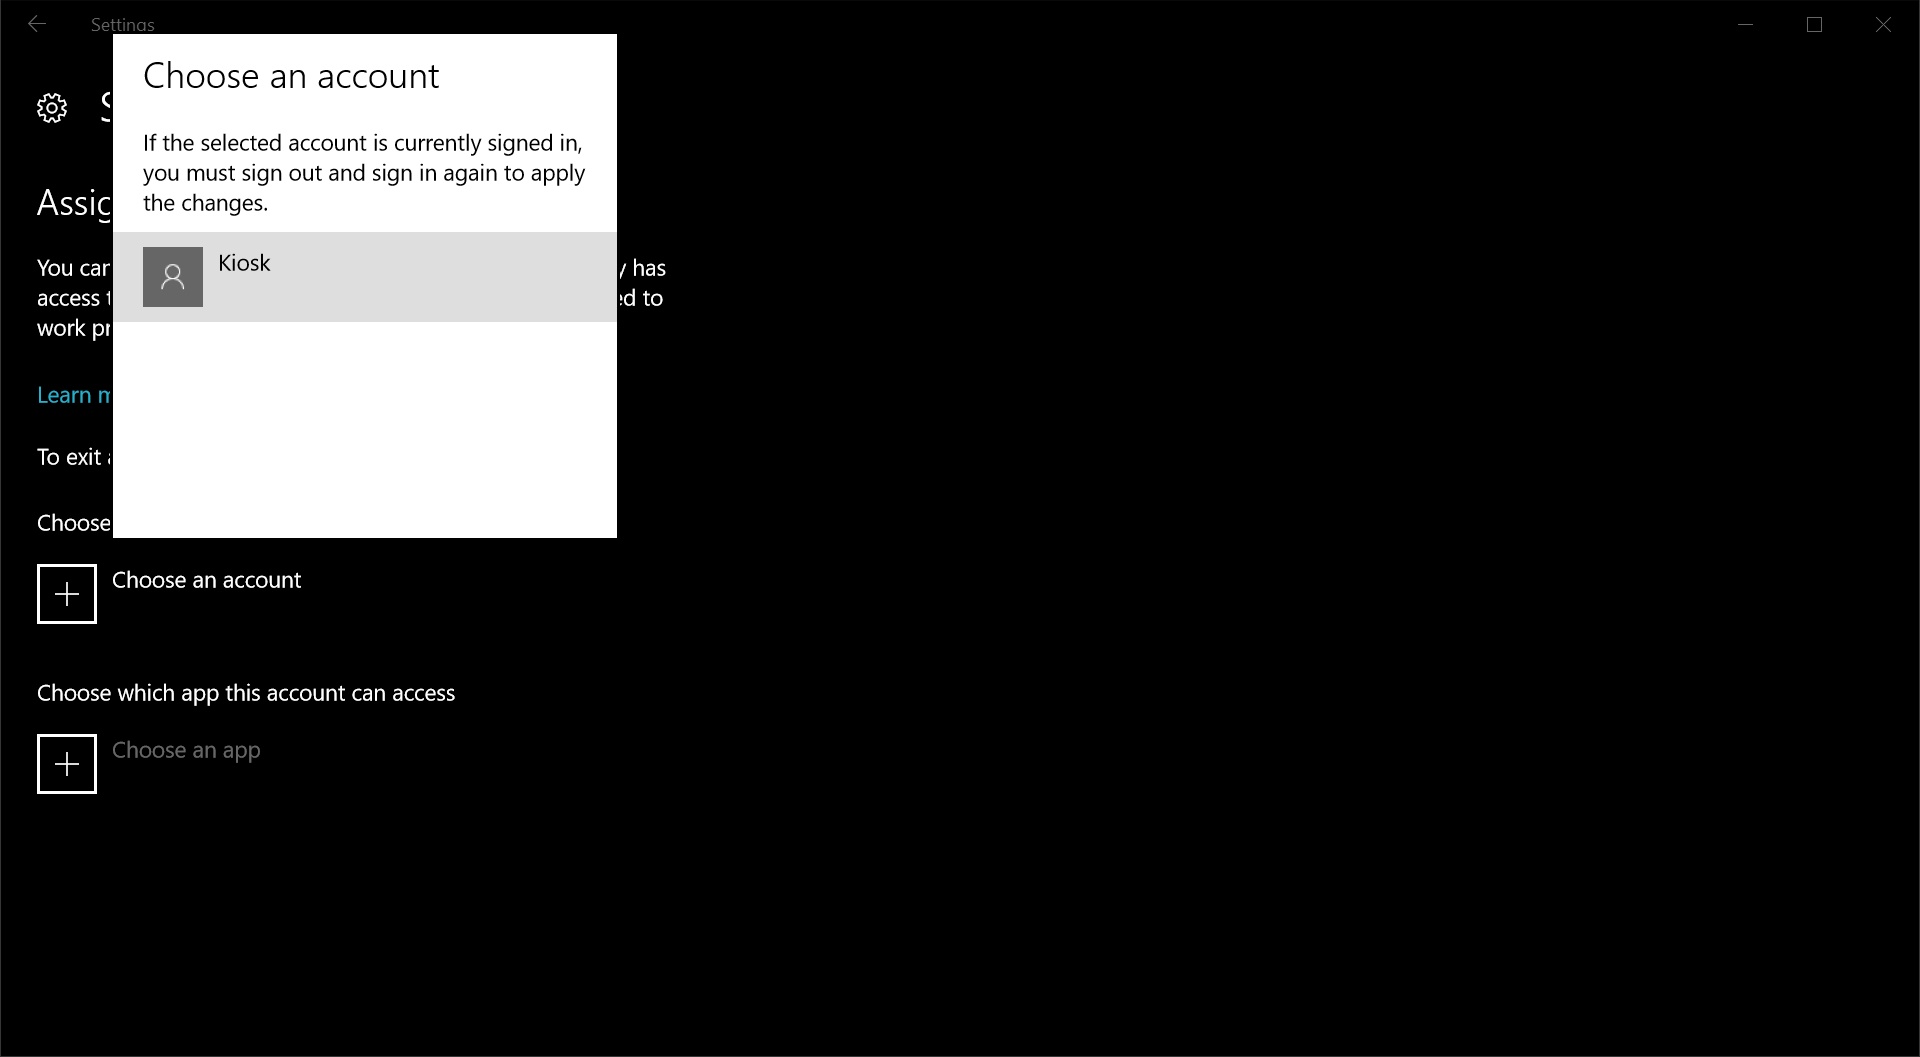
Here we will finally be able to choose the apps to assign to this account, by clicking on “Choose an account”, to select which local account should be set up with restricted privileges, and then “Choose an app” to select one app we want that account to be able to access exclusively.

When logging in the new local account, we will see that the desktop does not allow access to any system features, including the Start Menu, the Taskbar, or any desktop icon, and that the one app selected for that account has no close, minimize or maximize buttons available.

Final thoughts
Here is a few things we need to understand about local accounts. A local account is an account that is always active, even when we are logged in with a different account. This is due to the fact that we may want multiple users on the same local network to be logged in at the same time, for instance when we have multiple devices in a store, each one set up with a different app.
When logged in as administrator, we can easily turn on and off each account, from the task manager (Ctrl+Shift+Esc), under the Users tab, where a list of the active users on that computer or network is visible.
To manage a user, we’ll simply right click on the user we want to manage, and select different options available, like signing off/logging out, sending a direct message, or switching the user account.
Ready to shop?
If you are looking for the ultimate Windows 10 tablet, PortableOne has the best deals on Surface Pro 3 and Surface Pro 4, as well as a full range of accessories.