How to replace the Apple logo on the back of your iPhone, with a MacBook-style glowing one.
If you are a particularly dedicated Apple fan, and own an iPhone 6S, you may be among those who wish the Apple logo on the back of your phone would glow like the one on your MacBook.
Fortunately, David Cogen from “TheUnlockr”, has come up with a very complex, 100% warranty-voiding procedure, to replace the boring, un-glowing logo on the back of the Apple iPhone 6S, with a MacBook-inspired glowing version, along with four different kits, priced between $34.99 and $37.99, covering the entire iPhone 6 and 6S line-up.
Just how complex and warranty-voiding is this procedure? Very.
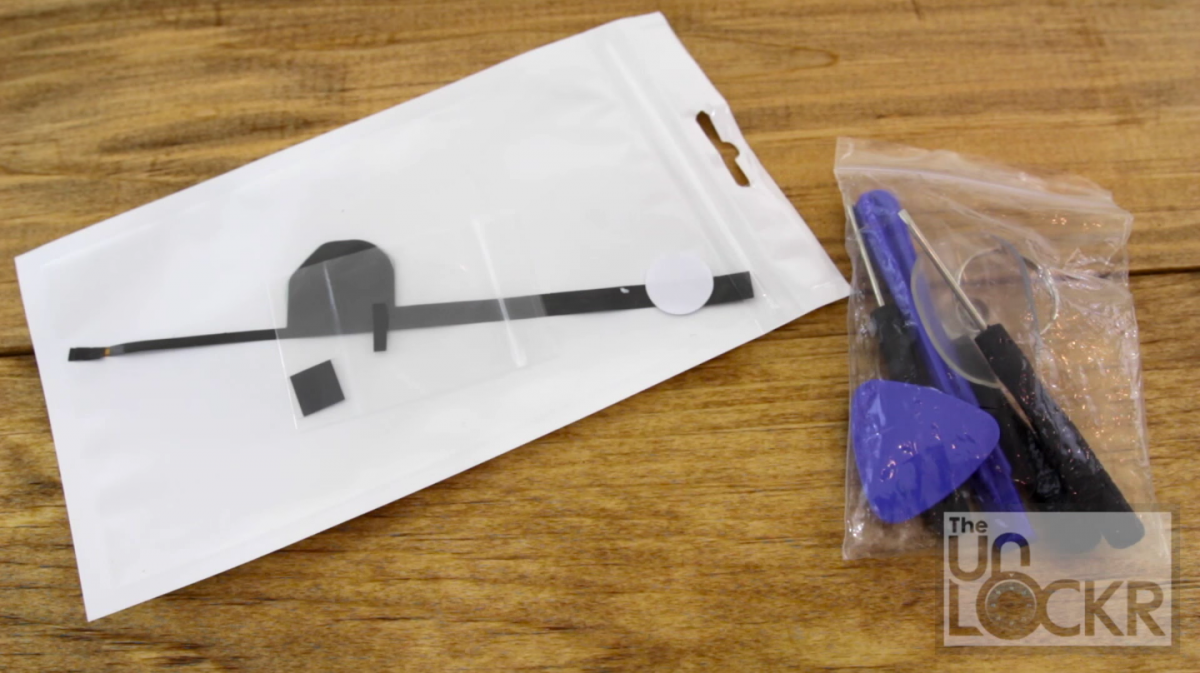
First off, the glowing Apple logo kit comes with a set of basic tools, similar to those used by iFixit during their teardowns, such as a pick, useful in prying the case of most iOS devices open, a set of screwdrivers, each one for each different screws that keep the iPhone 6 together, a suction cup, and a plastic shimmy.
Aside from the tools, the actual replacement logo comes in the form of a long plastic device, with one end being a connector, most likely designed to draw power from the iPhone’s battery, for glowing purposes.
Taking apart an iPhone 6, as we have witnessed from previous teardowns, is not exactly a walk in the park, but it can be accomplished with a bit of work.
We start with the removal of the two tiny screws holding the Lightning port connector together. Once the screws are removed, the suction cup is attached on the touchscreen, and with a high level of care and gentle nudging, the screen is pulled from the case, while the gap formed between the screen and the body is widened using the plastic shimmy, until the touchscreen can be lifted up all the way.
At this point we could say that it’s just a matter of removing the screen completely, as well as the battery, but, no, this is not the case, as in order to remove the touchscreen, it’s necessary to remove first a number of screws that still hold the touchscreen securely onto the body from the top edge.
Now comes the hard part: the battery. On most iPhones, including the iPhone 6 and 6S, as well as most iOS devices like the Apple iPad and iPod Touch, the battery is glued in place, which makes it impossible to remove without applying heat to melt the glue. This is one giant caveat, and a reminder that up to this point you are still able to “chicken out” and put your very expensive, warranty-voided smartphone, without damaging it further.
With that said, if you are feeling particularly bold and dedicated, it’s time to get a hair-dryer and, very carefully, blow hot air on the back of the case (not the front, and most definitely NOT on the battery directly!).
This process is long and tedious, as heat must be applied gradually, with pauses in between, to check how loose the battery gets before being completely free, at which point. According to the pictures posted by Cogen, we can see how a flat, dining table knife was used to apply some extra leverage to free the battery.
Once the battery is completely out of the main body, we’ll have a clear shot at the back of the rear panel, and the Apple logo’s shiny metal plate.
Using the kit’s plastic pick, we’ll proceed to remove the tape and glue holding the stock Apple logo in place. One nasty little surprise, at this point is that the plate that is integral part of the Apple logo, will inevitably, and irreversibly be bent and ruined, during the process of removing it from the case.
Finally, the brand new glowing Apple logo can be placed inside the case, by positioning it flush in the Apple logo cutout.
As much as we would love to say that at this point we can just stick the battery back in, screw the phone back together and be done with it, as we dry the cold sweat from our foreheads, no: there is still one small job to be done, which is necessary to connect the new logo to the iPhone’s battery.
According to Cogen’s tutorial, there is a small amount of material that must be scratched away, to unveil the contacts that will power the glowing logo, on the back of the touch screen’s hardware. After that, comes the delicate procedure of connecting the glowing logo to the iPhone’s battery, which requires some tape, for good measure.
After this last procedure, the phone can be safely put back together.
Also according to Cogen, the glowing accessory does not affect battery life, which is great news, as long as the phone still works after the fact.