Did you just get a new MacBook Pro? Here’s your 8-point checklist
You’ve finally did it: you are a proud owner of a brand new shiny 2016 Apple MacBook Pro with Touch Bar... or without the latter, if your cup of tea is closer to the entry level 13 inch model.
What to do once your Mac is out of the box? Here is eight items to check off your list, within the first fifteen minutes after powering up your new MacBook for the first time:
Update your MacBook
Keeping your new Mac up to date is part of a healthy routine that ensures smooth operations, and keeps your Mac safe from the latest exploits. The new MacBook Pro ships with macOS Sierra, which is a new generation of Apple’s flagship desktop operating system. The new environment is packed with awesome features, and it also runs off secure and proprietary Apple File System (APFS). APFS is also the same file system used by the latest versions of the Apple iPhone, iPad Pro, Apple TV, and Apple Watch.
Keeping macOS Sierra up to date is easy: simply click on the Apple button, select “About This Mac”, then navigate to the General tab, and click the “Software Update” button.
Setting up Siri for Mac
Surprise! Just like your iPhone, your new MacBook Pro can be used with Apple Siri.
Apple’s voice-activated virtual assistant is typically activated by default, out of the box, but for those who would rather not use it, it can be switched off by going into System Preferences > Siri.
In the same dialog box, Siri’s voice, audio input, and triggering method, can be configured.
Siri can be set to trigger buy holding Command+Space, or it can be configured to simply activate by saying “Hey Siri”.
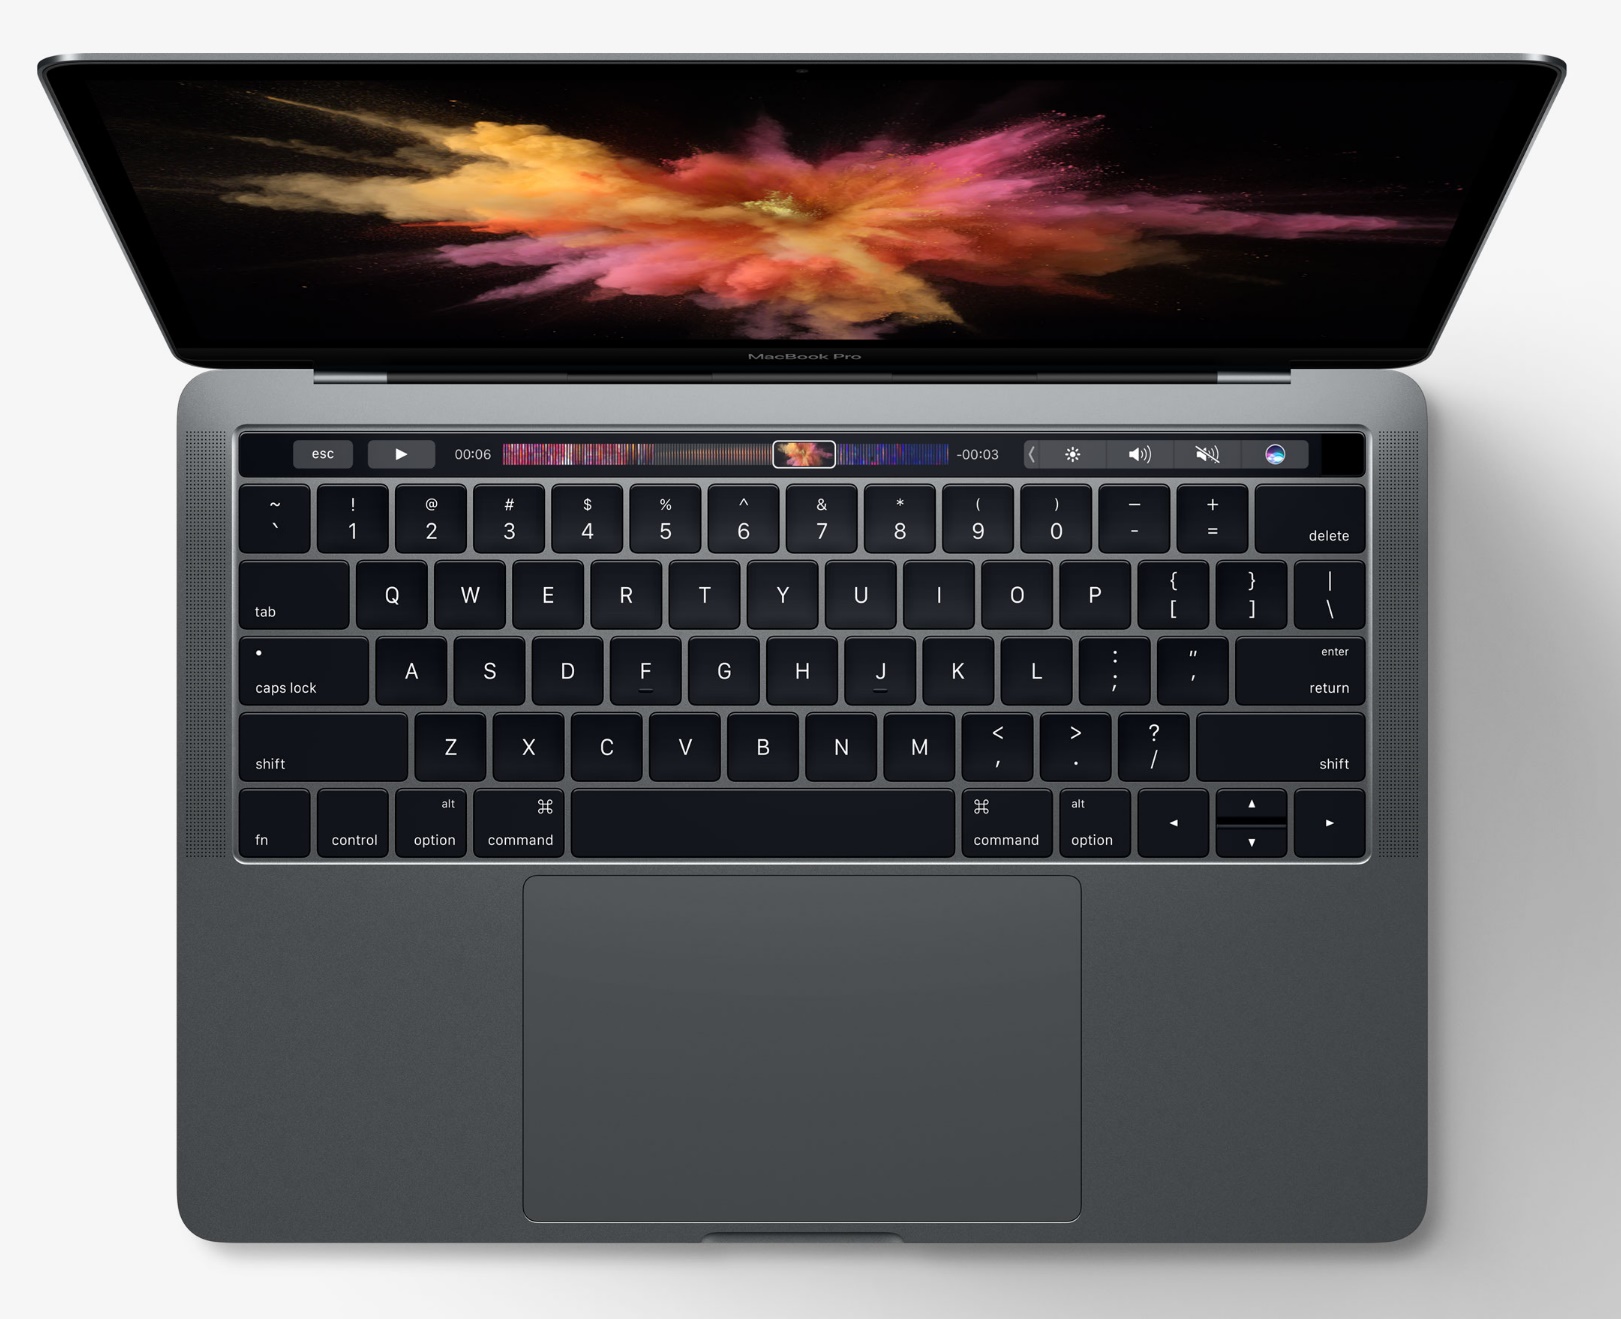
Configuring the Touch Bar
If you bought a 15 inch Apple MacBook, you will notice that cool, colorful strip atop the keyboard. That is your MacBook Pro’s Touch Bar, which is basically a programmable extension of your keyboard. The Touch Bar reconfigures itself depending on the application running, by providing visual feedback, and quick commands and controls. For instance, when listening music on iTunes, the Touch Bar makes available a volume slider and playback controls. If you are a creative who often works in Photoshop, the Touch Bar offers application specific controls, such as color pickers, image editing sliders, and more. There are plenty of applications that use the Touch Bar, including all major commercial suites for office tasks and creative production.
Customizing your Touch Bar can be done easily by going into System Preferences > Keyboard, and click Customize Control Strip. This will bring up an interface from which you can drag and drop controls directly into the Touch Strip.
Setup iCloud
Apple iCloud offers 5GB of free storage, and more space for a relatively affordable price. Apple has cut iCloud storage pricing in half in 2015, while announcing the iPad Pro, to keep the service competitive alongside Google Drive and DropBox.
You can periodically backup all your data on iCloud by going into System Preferences > iCloud > iCloud Drive. From there, you can choose which folders and items to backup automatically.
Pick a default browser
Just like on Windows 10, macOS lets you pick a different default browser. While Apple Safari ranks rather well for performance and ease of use, we are all creatures of habits, and some of us like to stick with what we know and like best, like Google Chrome, Mozilla Firefox, or Opera.
To setup a new default Internet browser, open System Preferences > General, and select a new browser from the Default web browser drop down list.
Scrolling direction
You may already know this setting if you are one of those users who cringes at the sight of a roll of paper towel turned towards the wall. Some of us like to swipe up on a MacBook’s trackpad, to move upwards, while others like to scroll down. As hard to believe as it may seem, the latter is actually the default “natural” setting in macOS Sierra.
To change this behavior, let’s go into System Preferences > Trackpad, and click Scroll & Zoom. Uncheck the “Scroll direction: natural” checkbox, and the world will finally make sense again.
Hot corners
Some users have a love-hate relationship with hot corners on macOS. Some love them, and configure them in a variety of creative ways. Others find the constant morphing on the desktop into mission control as the cursor gets too close to a corner of the screen, simply irritating.
To change the behavior of hot corners in macOS sierra, go to System Preferences > Desktop & Screen Saver > Hot corners.
Move the Dock
The Dock in macOS Sierra is the closest equivalent to the Windows Taskbar, as it provides a quick shortcut to applications. In macOS sierra, just like in previous versions of Mac OS X, the dock can be moved to either sides of the screen, but not to the top, for obvious reasons.
To change the position of the Dock, go to System Preferences > Dock, where you can setup the size, on-hover magnification, position, visual effects, and other behaviors.
Ready to shop?
If you are looking for the perfect MacBook, PortableOne has you covered with a great selection of Apple MacBooks, as well as the newly unveiled 13 inch and 15 inch MacBook Pro with TouchBar.