Customize Windows 10 Start Menu to resemble Windows 7
If you have recently upgraded to Windows 10 from Windows 8, and still feel sour about your start menu experience, the good news is that Windows 10, as of the Anniversary Update, offers customization options that will bring your new start menu as close to Windows 7 as it gets without third party plugins and additional software utilities.
The Windows 10 start menu is a fusion between a traditional Windows 7 start menu, and windows 8 Metro dynamic tiled interface, which means that on the right side, the new taskbar menu features a panel where active tiles behave in the same way as desktop icons, expect that they can be pinned in groups for easier retrieval and organization. On the left side, the start menu offers system-specific links and menus that let you open File Explorer, access settings, manage shared folders, shutdown/restart the computer, and log off Windows 10, among other things.
To some users, the redesigned start menu may be a little awkward to use, with some users often reverting to using the taskbar as their primary hub to launch applications, and a growing number of users have also taken to using Cortana to finding files and programs to launch, either by typing in search terms, or simply talking to the virtual assistant.
If you are looking to regain some of the old Windows 7 start menu charm back, here is how you can achieve as close a look as it gets:
First off, if your start menu is set to full screen, we have to turn the fullscreen option off, by going into settings (Win+I), and navigate to Personalization > Start, and set Use Start full screen to OFF.
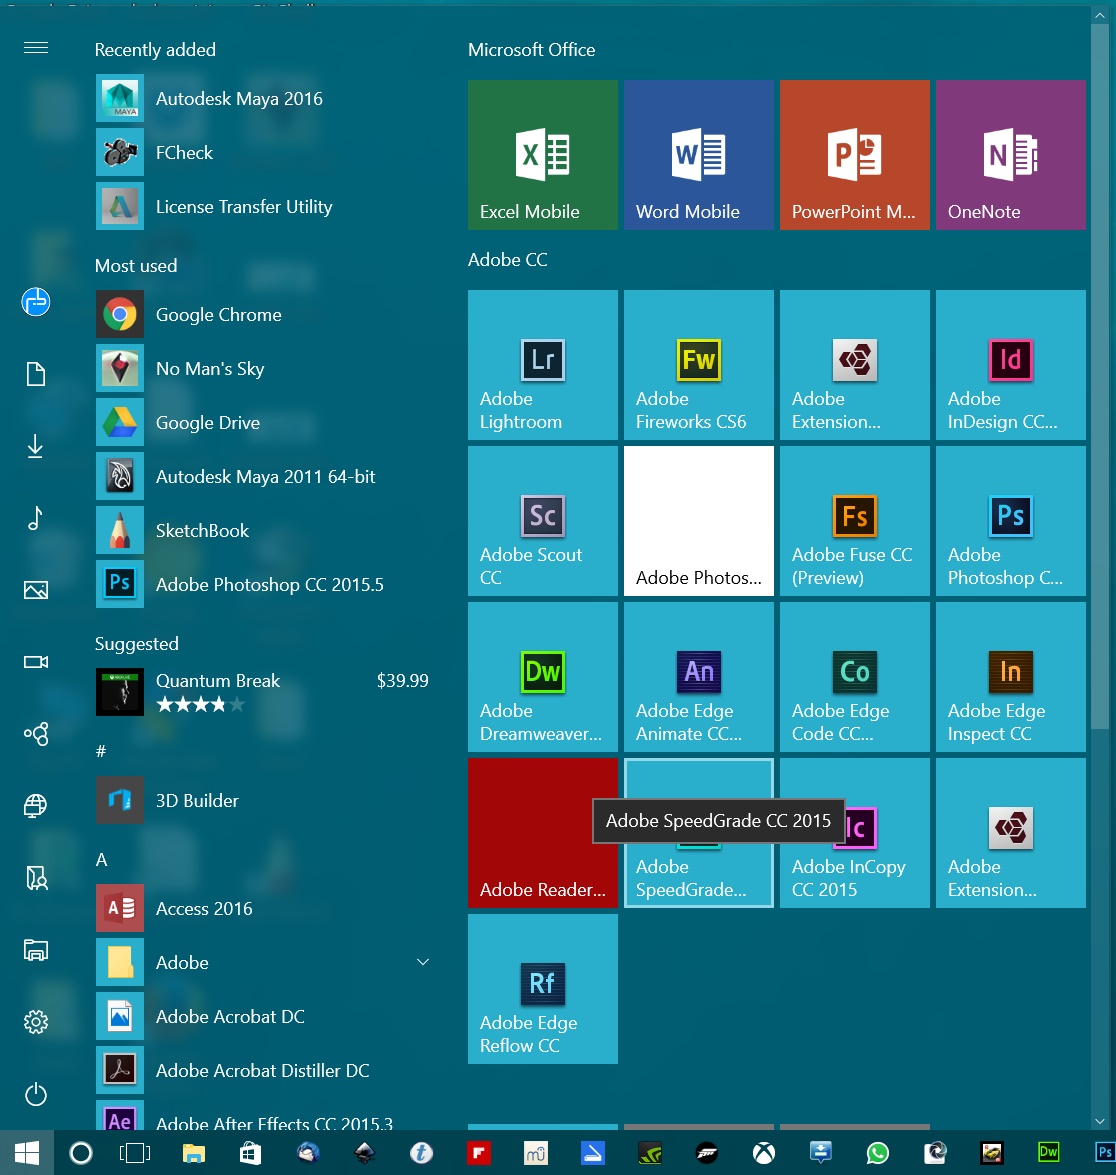
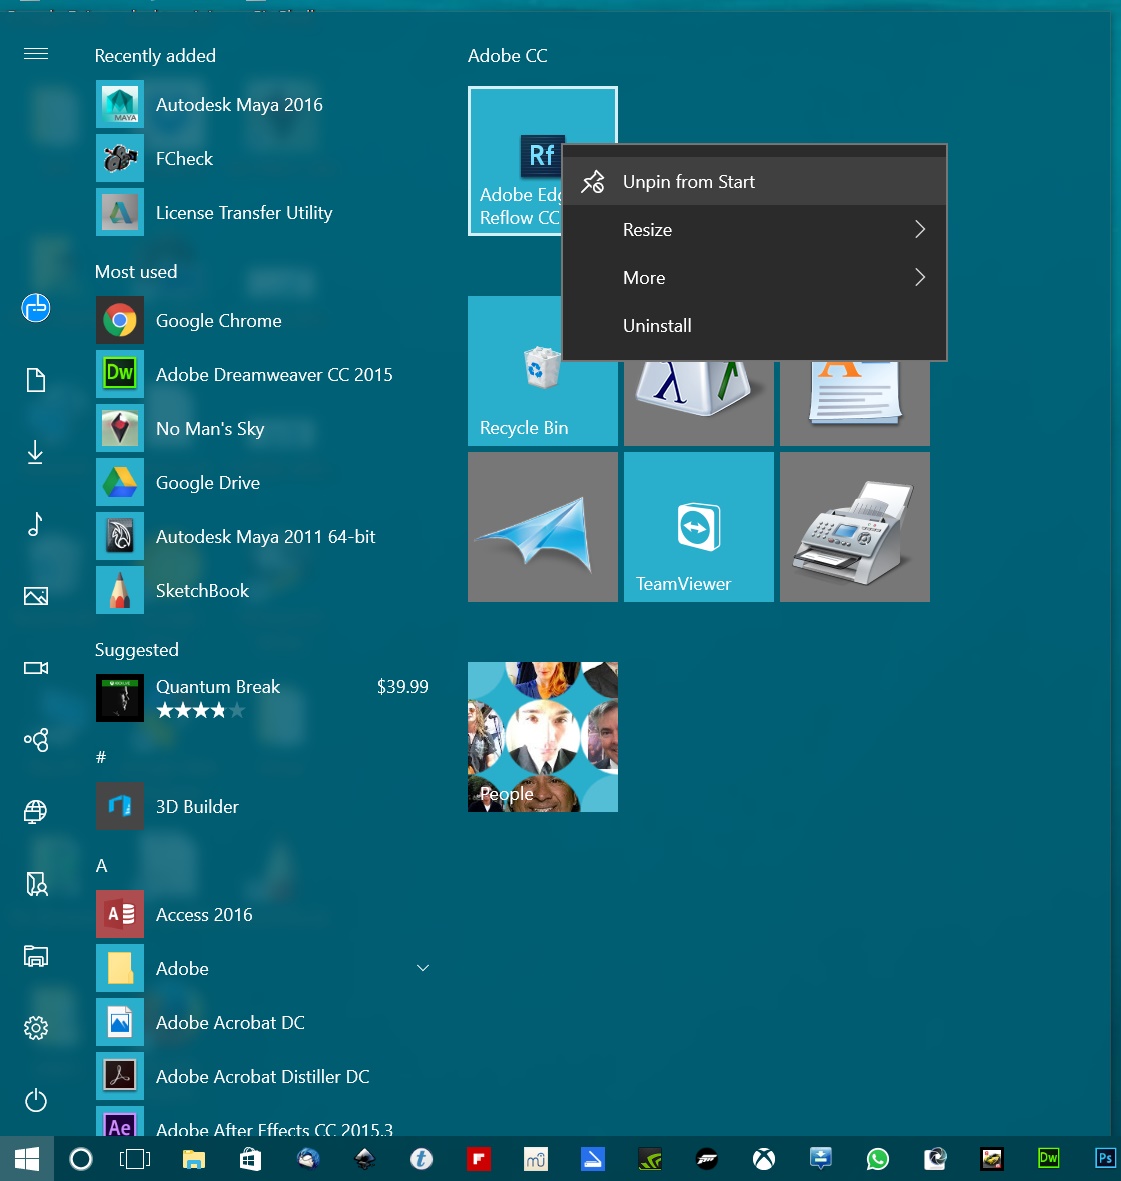
At this point, when opening the start menu, the menu is now down to a more manageable size, and we can go on to the next phase, which is to get rid of all dynamic tiles on the right side of the start menu. Unfortunately there is no way to simply remove groups of tiles, so we will have to do this one by one, by right-clicking on each tile and selecting “Unpin from Start”.
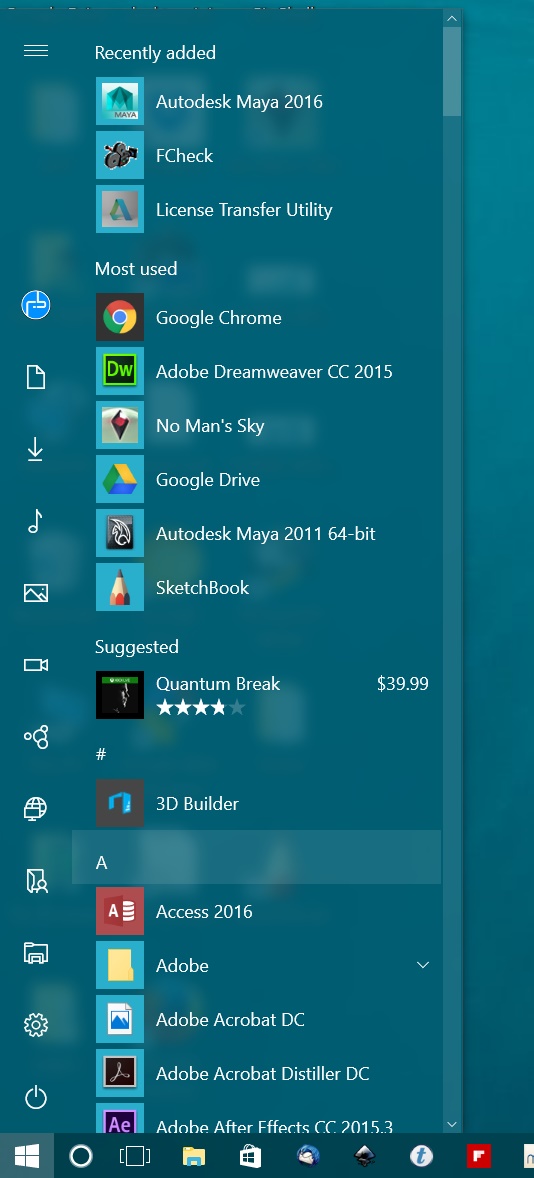
One the slate is clean, we’ll be able to pinch the right edge of the start menu and drag it to the left as far as it goes, to make the start menu a narrow rectangle, roughly the size of a traditional Windows 7 Start menu.
Finally, we only need to complete two final steps to achieve our objective. The first is to open Settings, and navigate to Personalization > Start, and turn off everything that we don’t wish to see in the start menu, such as ads (Occasionally shows suggestions in Start), recently open items, recently open apps, and most used/recently added apps.
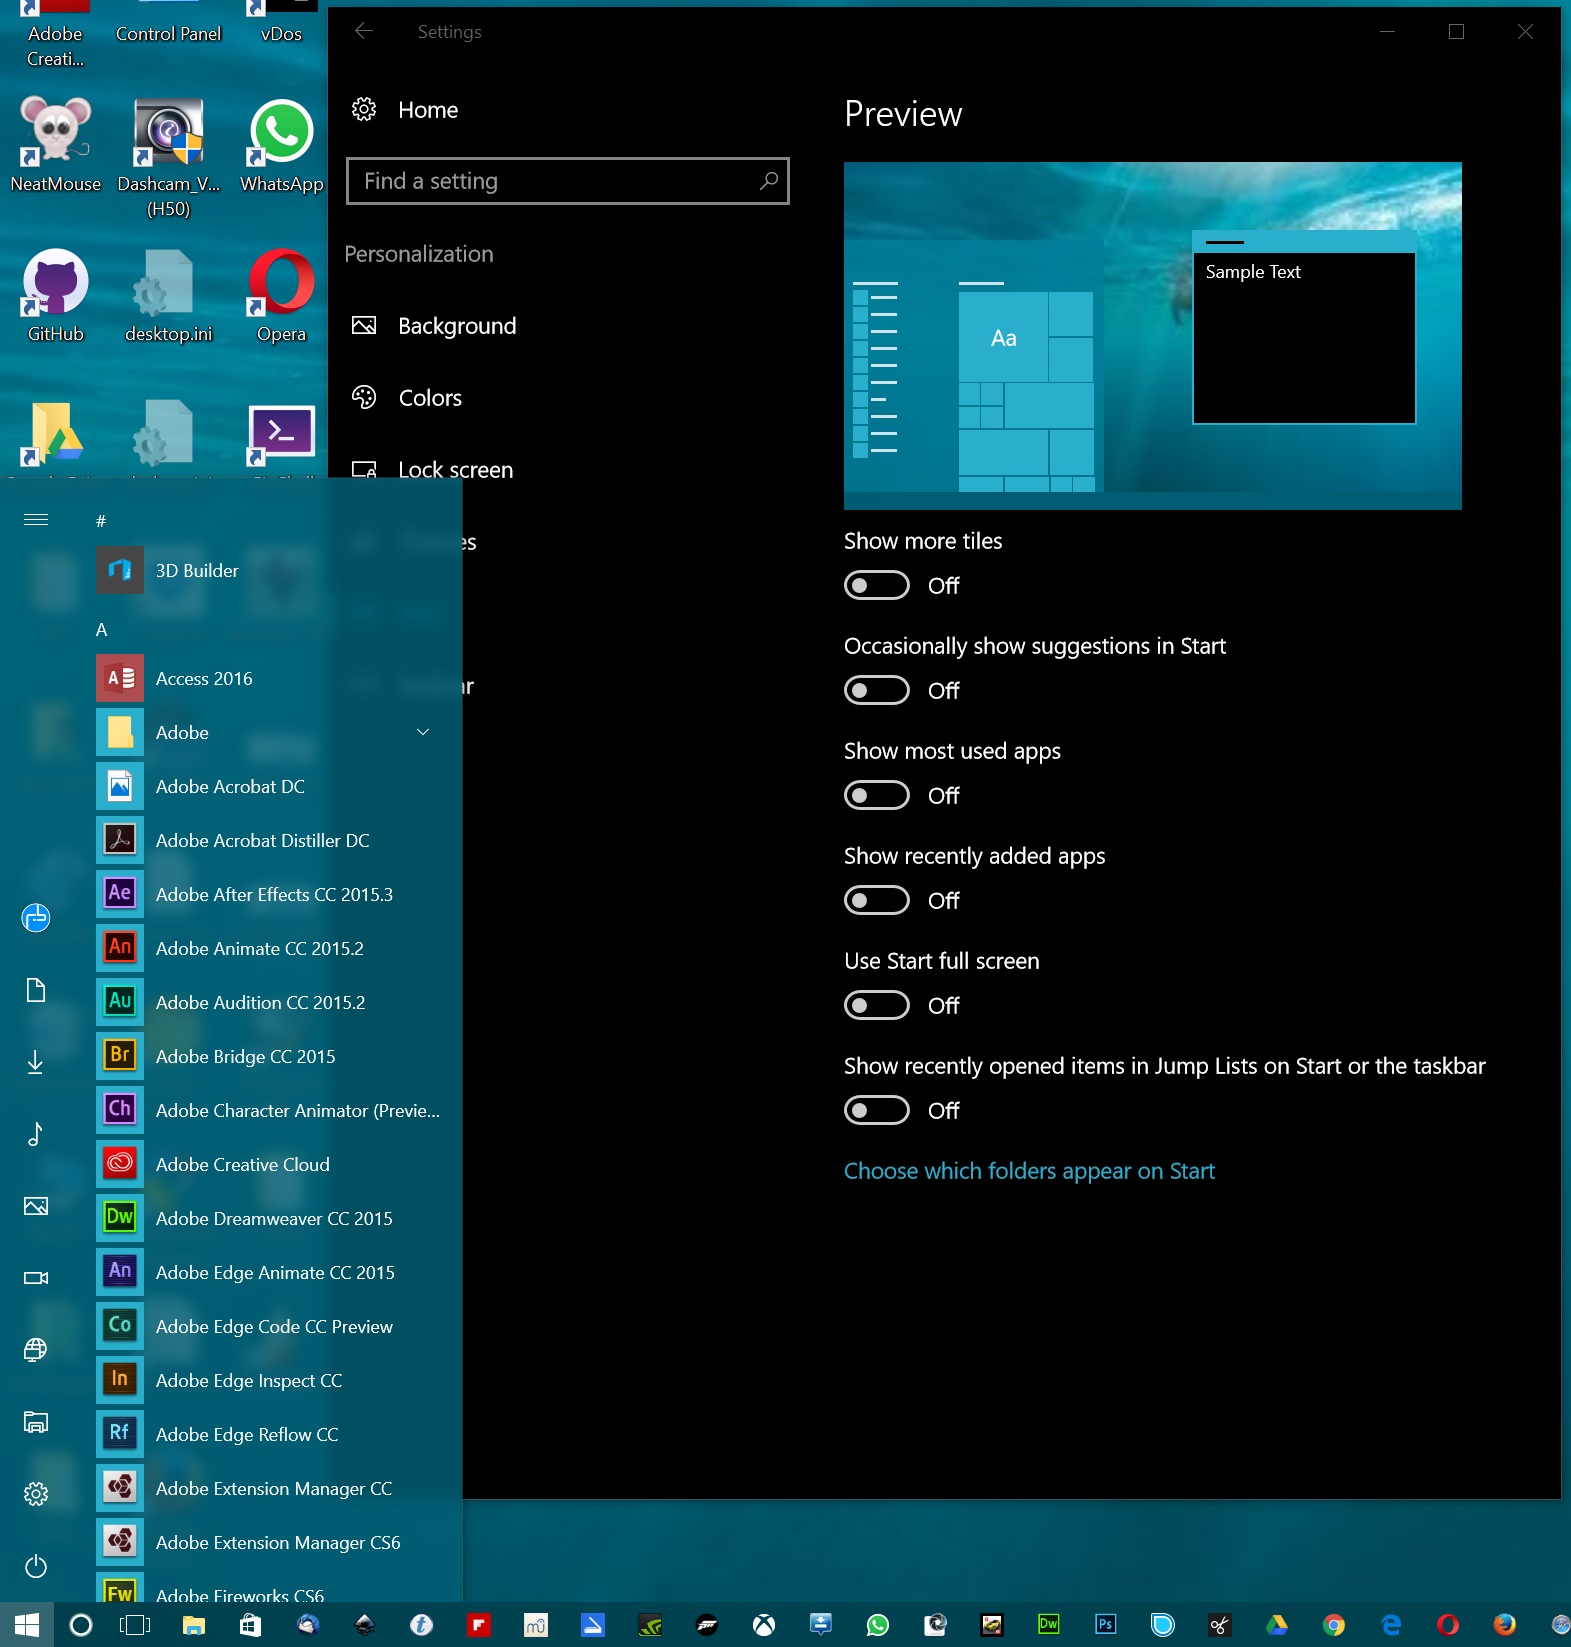
The second and final step is to click on “Choose which folders appear on Start”, where we can choose items like File Explorer, Settings, Documents, and more. Typically, you may want to have everything available, except for Homegroup and maybe Personal Folder, depending on your preferences.

The final result should be a slim, easy to use, functional, and most importantly familiar looking Start Menu, in Windows 10.
Ready to shop?
If you are looking for the ultimate Windows 10 tablet, PortableOne has the best deals on Surface Pro 3 and Surface Pro 4, as well as a full range of accessories.